How to Activate the Work Schedules Feature
To do so, go to the Settings / Company Settings page (only Owners and Admins can access it) and set Use work schedules to ON. 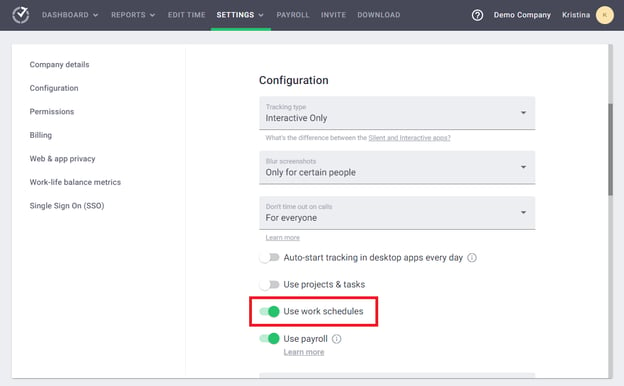
Once work schedules have been activated, you’ll see the Work Schedules page in your Settings menu and the Attendance Report in your Reports menu.
How to Set up Work Schedules
Method 1: CSV export and import
Importing and exporting a CSV file with schedules is the most efficient way of adding or editing multiple shifts at a time.
The process
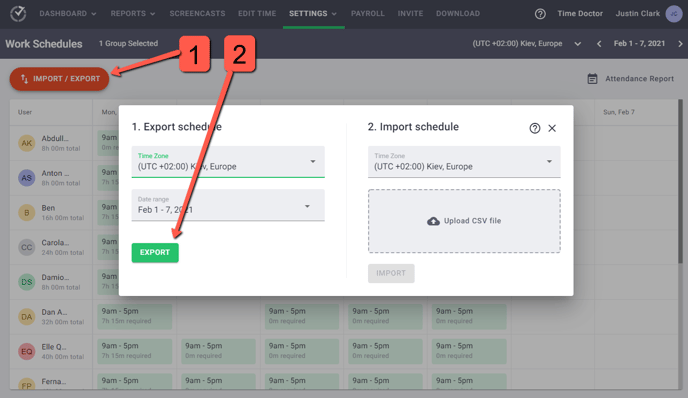
Step 1:
Go to Settings / Work Schedules and export a CSV file with the users and the date range that you want to add schedules for.
Step 2:
Add shifts to the exported CSV file.
The following columns must exist in the file you edit, but only the unique identifier column needs to have a value:
- Name
- Employee ID
- Unique identifier (Do not edit.)
- Date columns
The valid shift formats for date columns are:

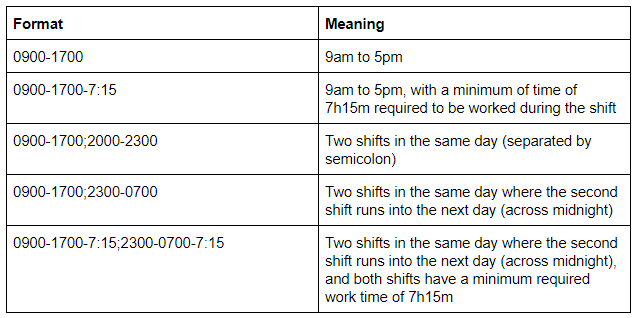
Here’s a sample file with the shifts filled out.
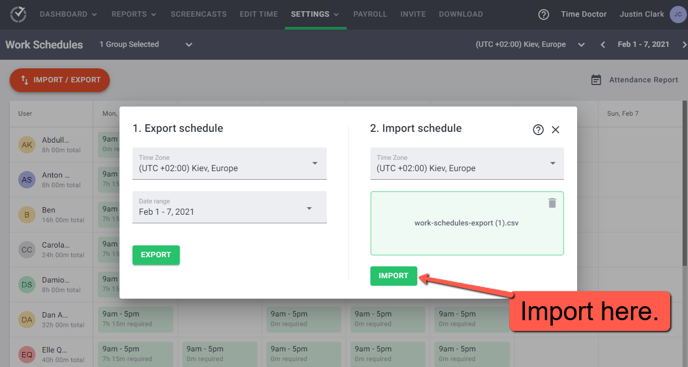
Step 3:
Upload the CSV file to Time Doctor.

Editing or Removing Work Schedules
Schedules can be edited or removed by uploading the same CSV file with shifts edited or removed. Any dates and users included in an imported file will overwrite any work schedules already in the system for those same users and dates.
How to set up schedules for the whole year using CSV import
If you have repeating schedules, such as Mon-Fri 9 am - 5 pm, you can export a CSV for the whole year (select the dates until the end of the year in Date range under Export schedule), set up shifts for one day or week and then easily copy them across. Please see the tips and tricks here.
If your employees never work on weekends, you can exclude weekend days from the CSV; see the Include weekends toggle under Export schedule. 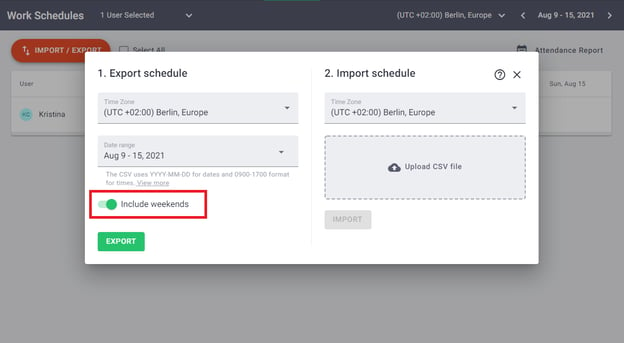
Method 2: Adding and editing individual shifts without CSV export
If you want to make a simple change such as to add, edit, or delete a single shift, you can do it without using the CSV import/export option. Hover over a day that does not have a shift to see a plus icon for adding one shift or hover over an existing shift to see icons for editing or deleting the shift to appear. You can also select multiple shifts or all shifts and delete them at once. 
Who can View or Edit Work Schedules
- Owners and admins can view, add, and edit work schedules for anyone in the company.
- Managers by default can view the work schedules of the people they manage. If they have been granted access to set up work schedules on the Settings / Company Settings page (Allow managers to set up work schedules setting), they can also create and edit the work schedules of the people they manage.
- Regular users can only view their own schedules.
- Clients don’t have access to this page.
Daylight Savings
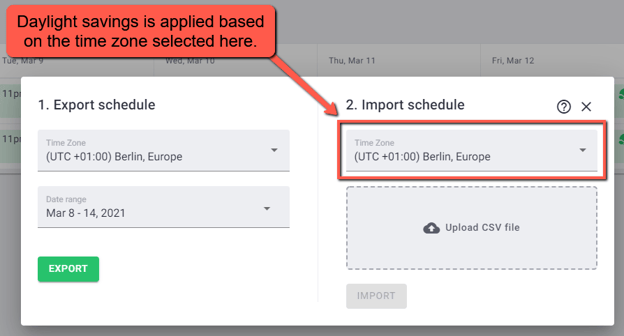
Time changes for daylight savings will be applied based on the time zone specified in the import popup:
If you create a shift without using the CSV export, time changes for Daylight Savings will be applied based on the time zone selected when creating a shift.
Example:
For example in 2021, Daylight Savings starts on:
- March 14 in Toronto
- March 28 in Berlin
If you specify "Berlin" in the popup's time zone field when uploading a daily shift from 9 am to 5 pm from March 1 to March 20, then when you're later looking at your Work Schedules or the Attendance report...
- If you select "Berlin" as the time zone at the top of the page, all shifts will run from 9 am to 5 pm throughout the entire date range from March 1 to March 20.
- If you select "Toronto" as the time zone at the top of the page, you'll see that from March 1 to March 14, the shifts run from 3 am to 11 am (because that's 9 am to 5 pm in Berlin for those dates), and from March 15 to March 20, the shifts will run from 4 am to 12 pm (because that's 9 am to 5 pm in Berlin for those dates)
So if you want your employees' schedules to remain stable in a certain time zone, select that time zone when creating work schedules.
If you have employees in different time zones, you'll probably want to upload a separate file for the people in each time zone.
The Attendance Report
Once work schedules have been added, you’ll see data in the Reports / Attendance report.
You can learn more about the Attendance report here.