How to Install Time Doctor on a Remote Desktop Server
Note: Installing Time Doctor via Remote Desktop Server is available in all Time Doctor Subscription Plans and can be accessed by Account Owners and Admins.
TL;DR:
Install the Time Doctor desktop app on your remote server using unattended mode and administrative rights. Publish it via RemoteApp. The app will only track activity within the remote session—not the local user’s computer.
How to Install Time Doctor on a Remote Desktop Server
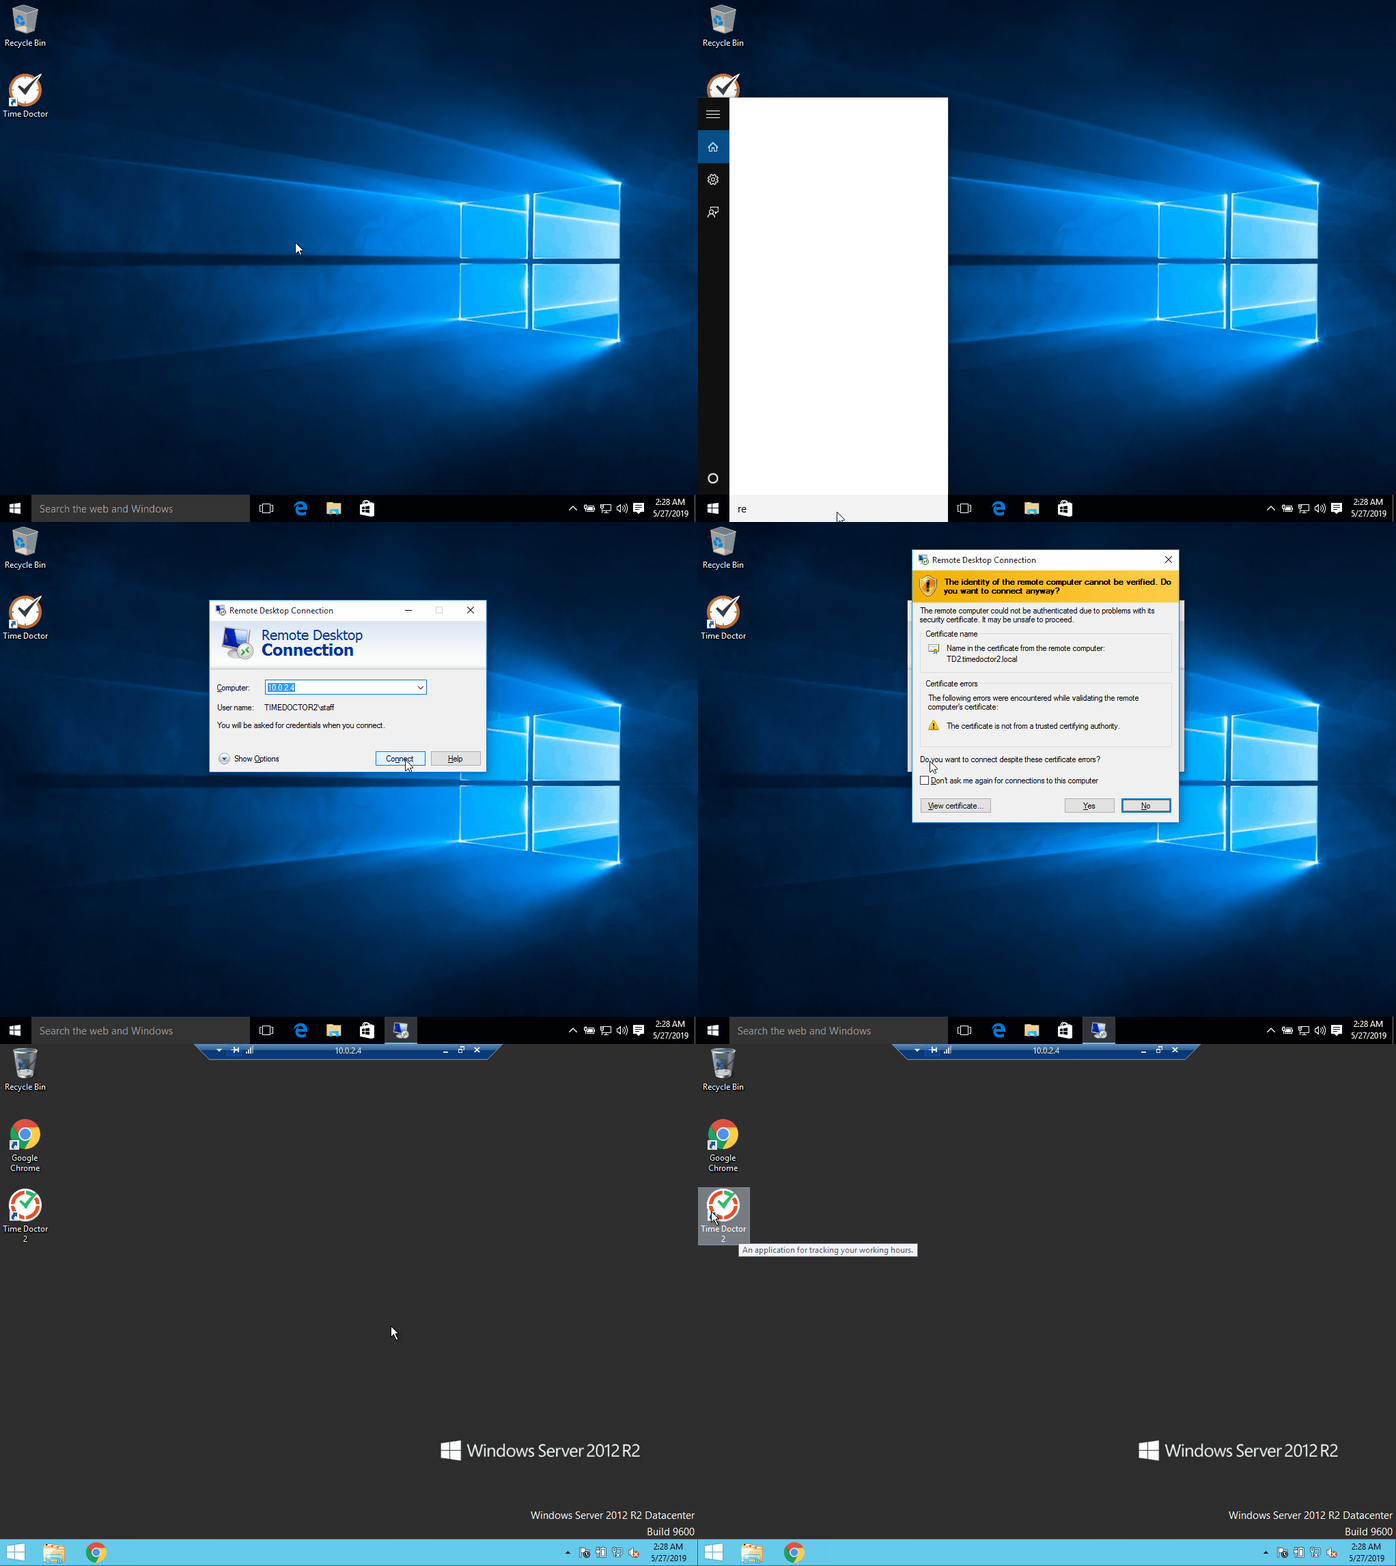
This guide explains how to deploy Time Doctor on a Remote Desktop Server so remote users can launch the app when connecting. The app will only track activity within the remote session—it won’t monitor the local PC.
- Administrative Access
Acquire administrator rights on the server to complete the installation. - Download Installer
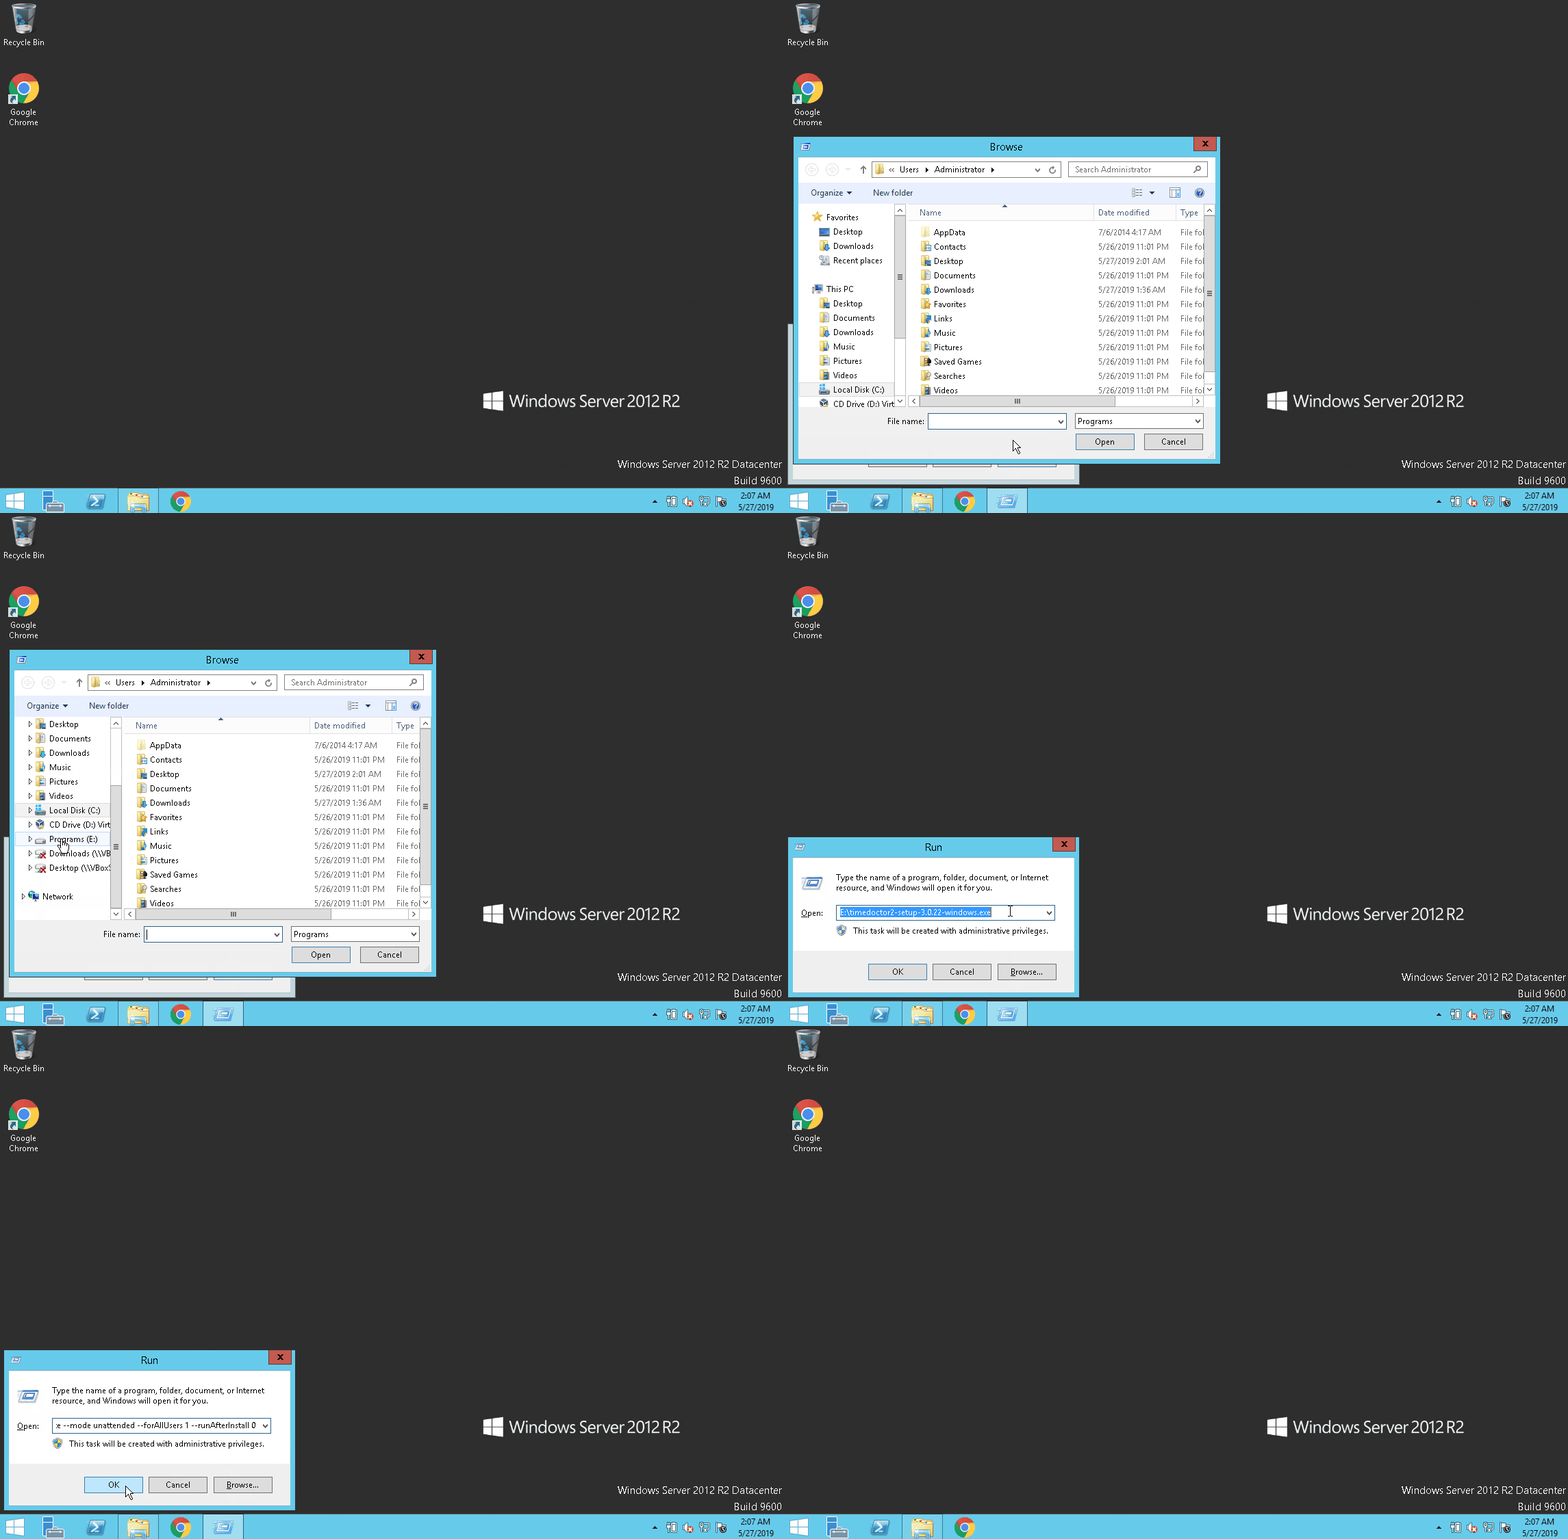
Download the Time Doctor desktop installer from the Time Doctor Downloads page.
- Install Silently
Run the following command with elevated privileges:--mode unattended --forAllUsers 1 --runAfterInstall 0(Note: These parameters work starting from version 3.0.22)
-
Publish via RemoteApp
-
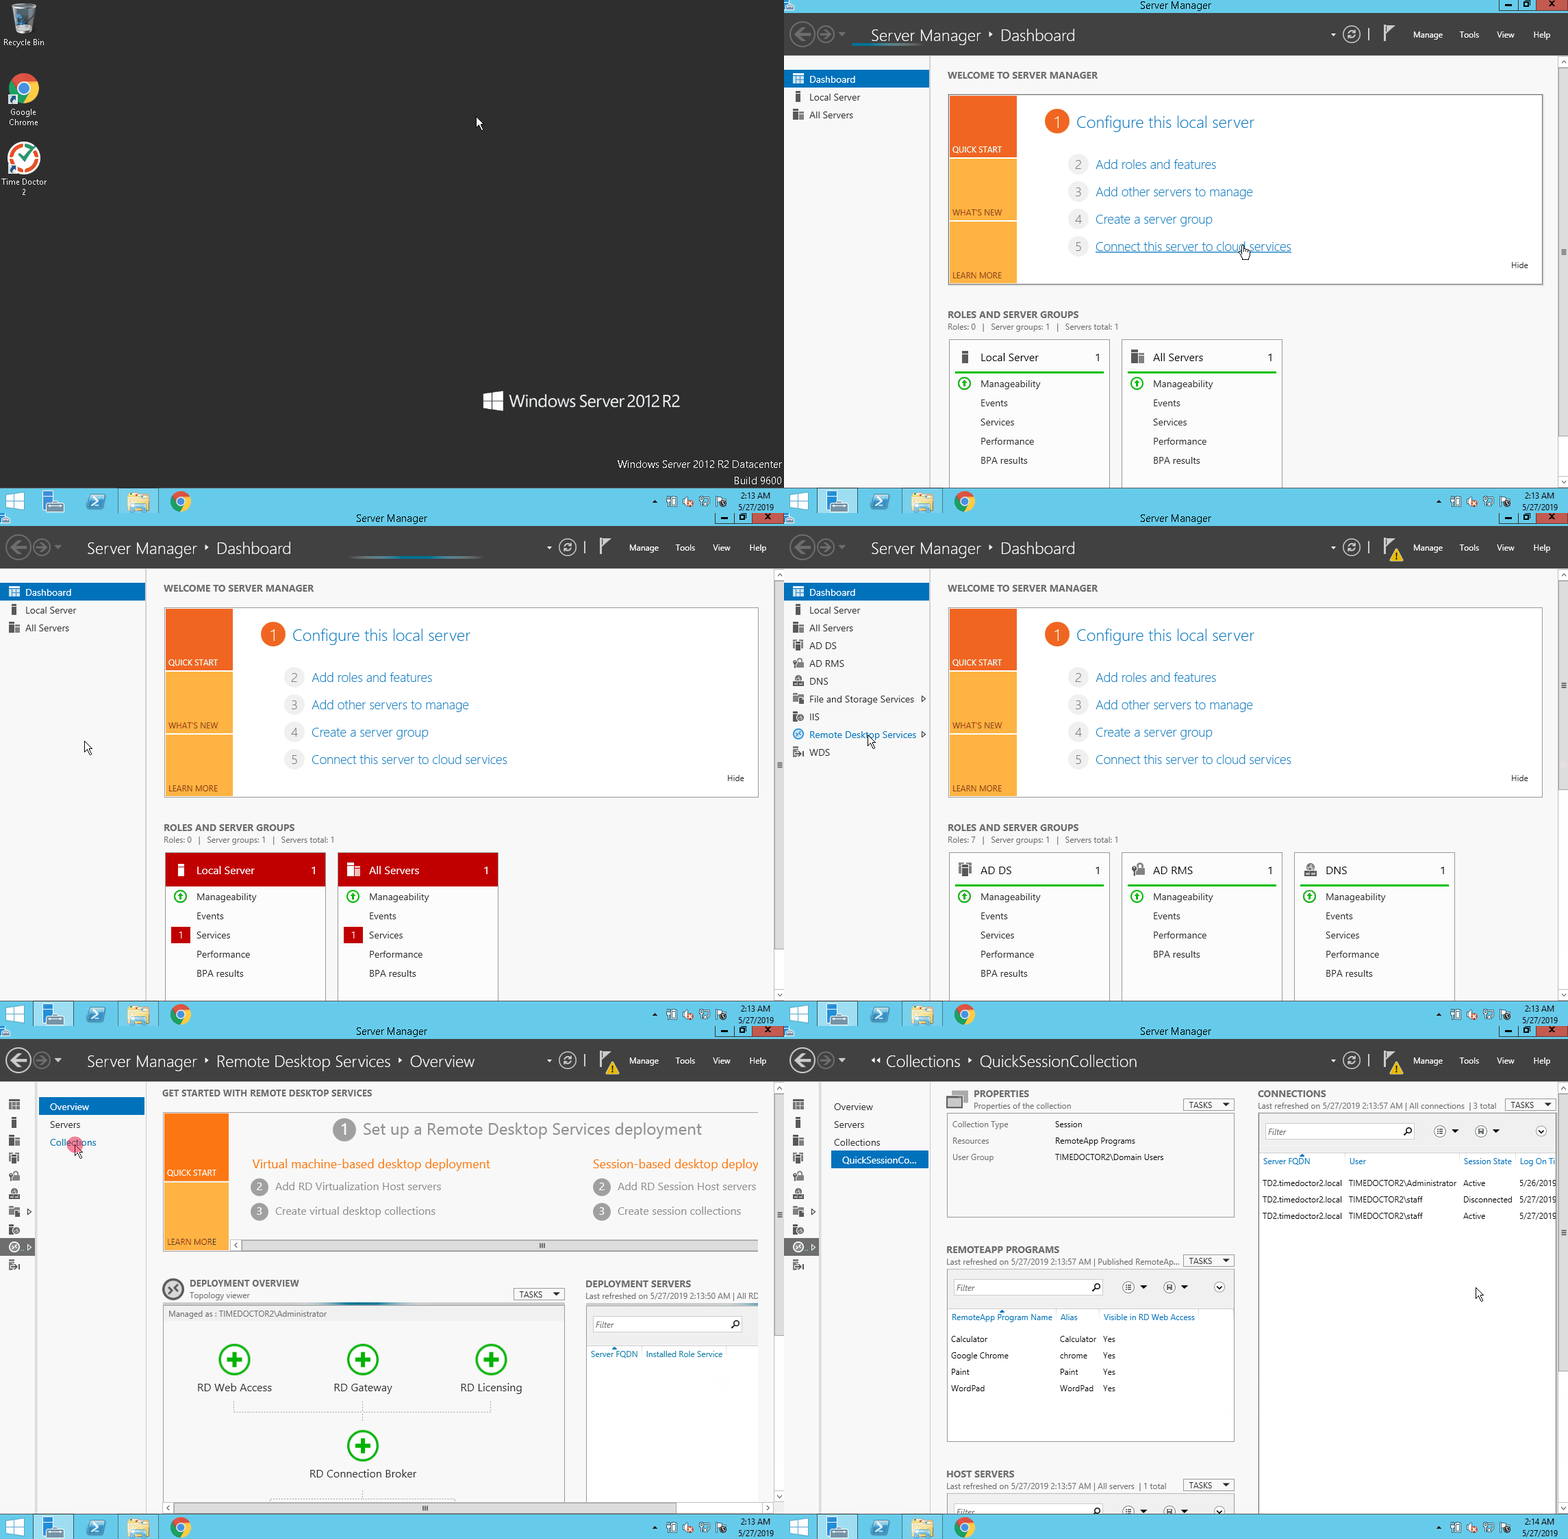
Open Server Manager → Remote Desktop Services → Collections → QuickSessionCollection.
-
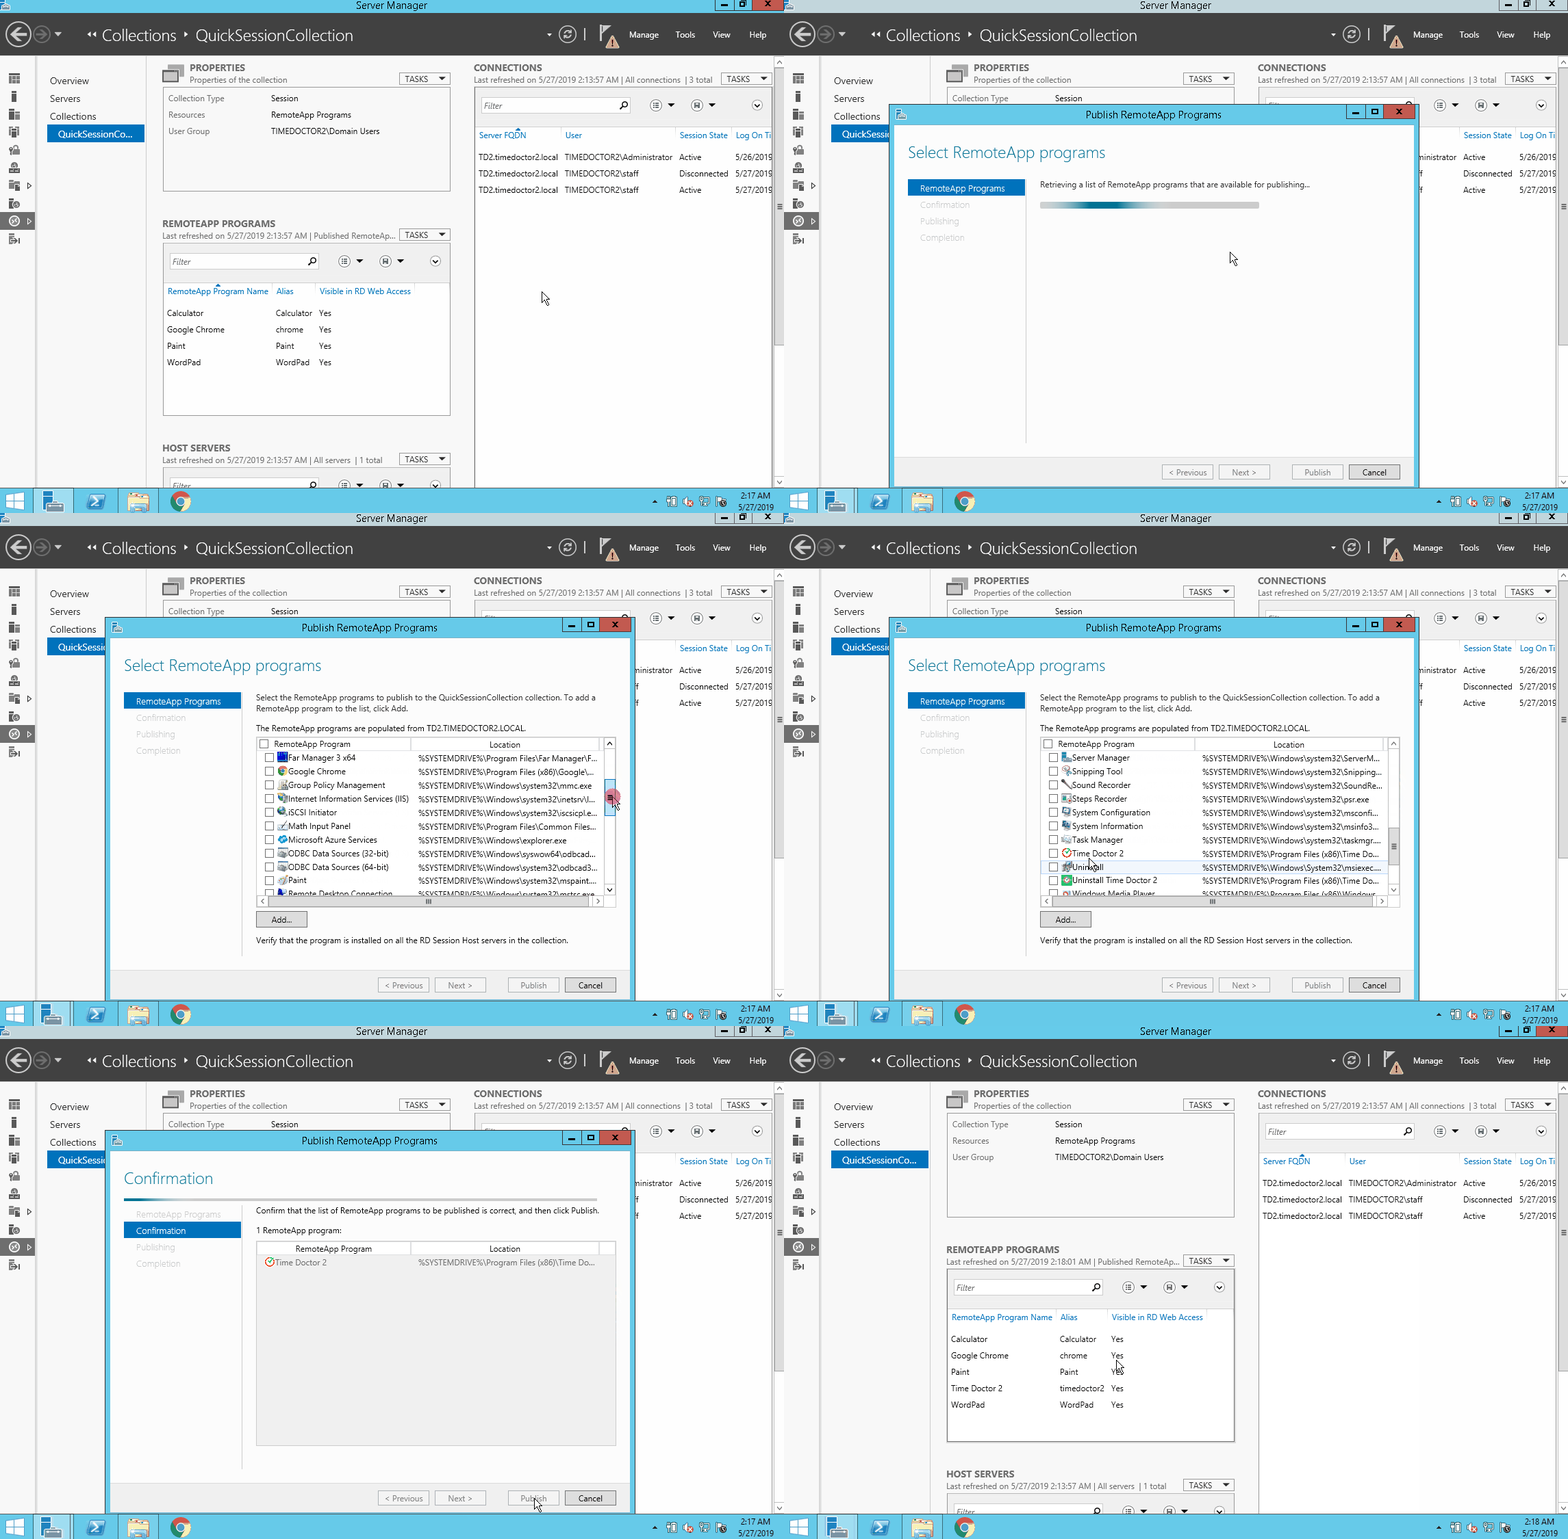
Click Tasks → Publish RemoteApp Programs.
-
Considerations for Local PC Tracking
-
If tracking on the user’s local PC is also needed, deploy the app locally in addition to the server install.
-
Be aware that using the Automatic (Silent) app can create a second Time Doctor user account, which may be confusing and count as a separate billable user.
Should there be any inconsistencies or concerns regarding the article, contact support@timedoctor.com for prompt assistance.


