How to Install/Uninstall Time Doctor With Group Policy Management
Note: The ability to Install/Uninstall Time Doctor With Group Policy Management is available with all Time Doctor Subscription Plans. This can be accessed by Owners, Admins, or an IT Department/Representative with access to the organization’s Group Policy.
TL;DR:
Download the MSI installer, share it with read access, create and configure a GPO to bypass UAC, and add the installer package for automated deployment. Update manually.
Install the Time Doctor desktop app on Active Directory computers using Group Policy Management. Administrator access to the server is required.
Install
Step 1: Download the Time Doctor MSI installer.
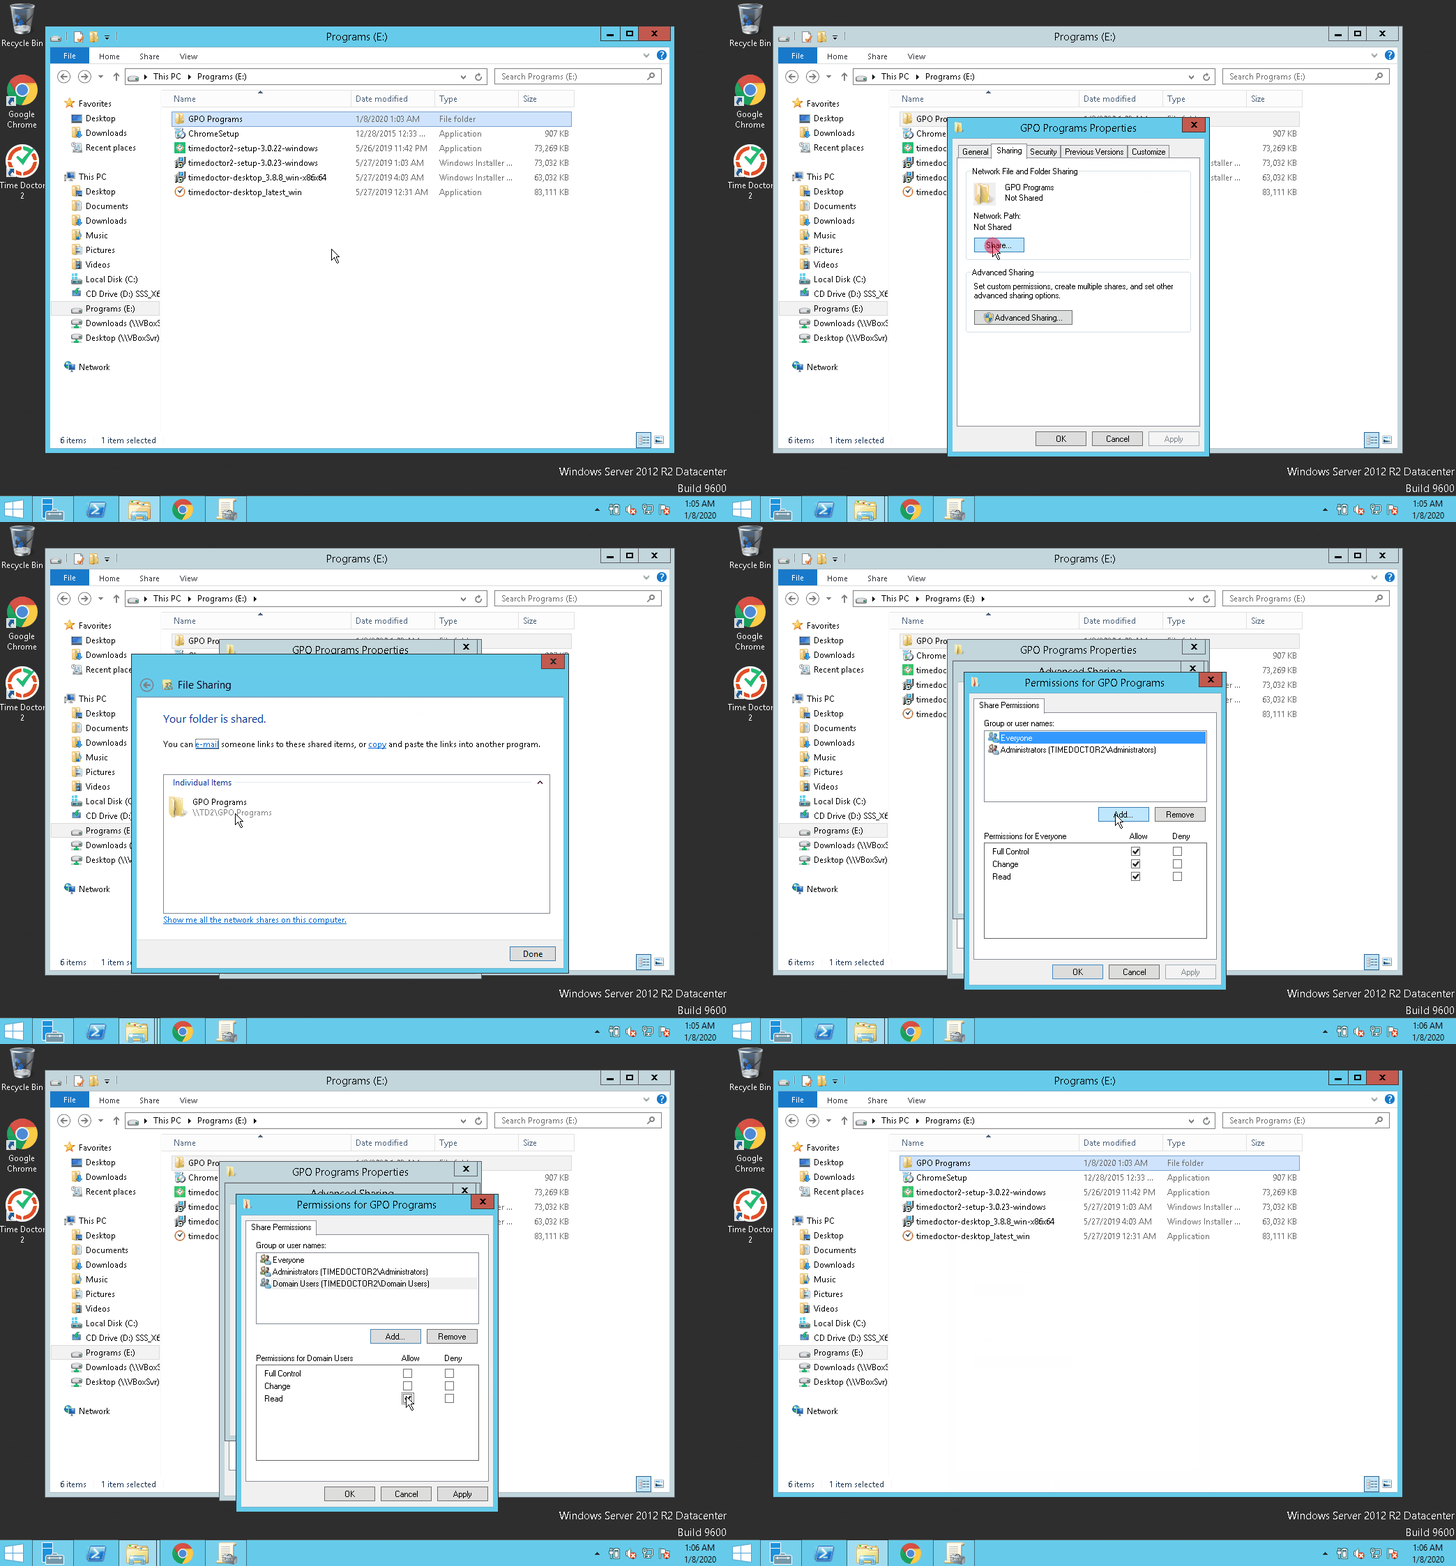
Step 2: Share the Installer
Place the installer in a shared server folder and grant Read access to domain users.
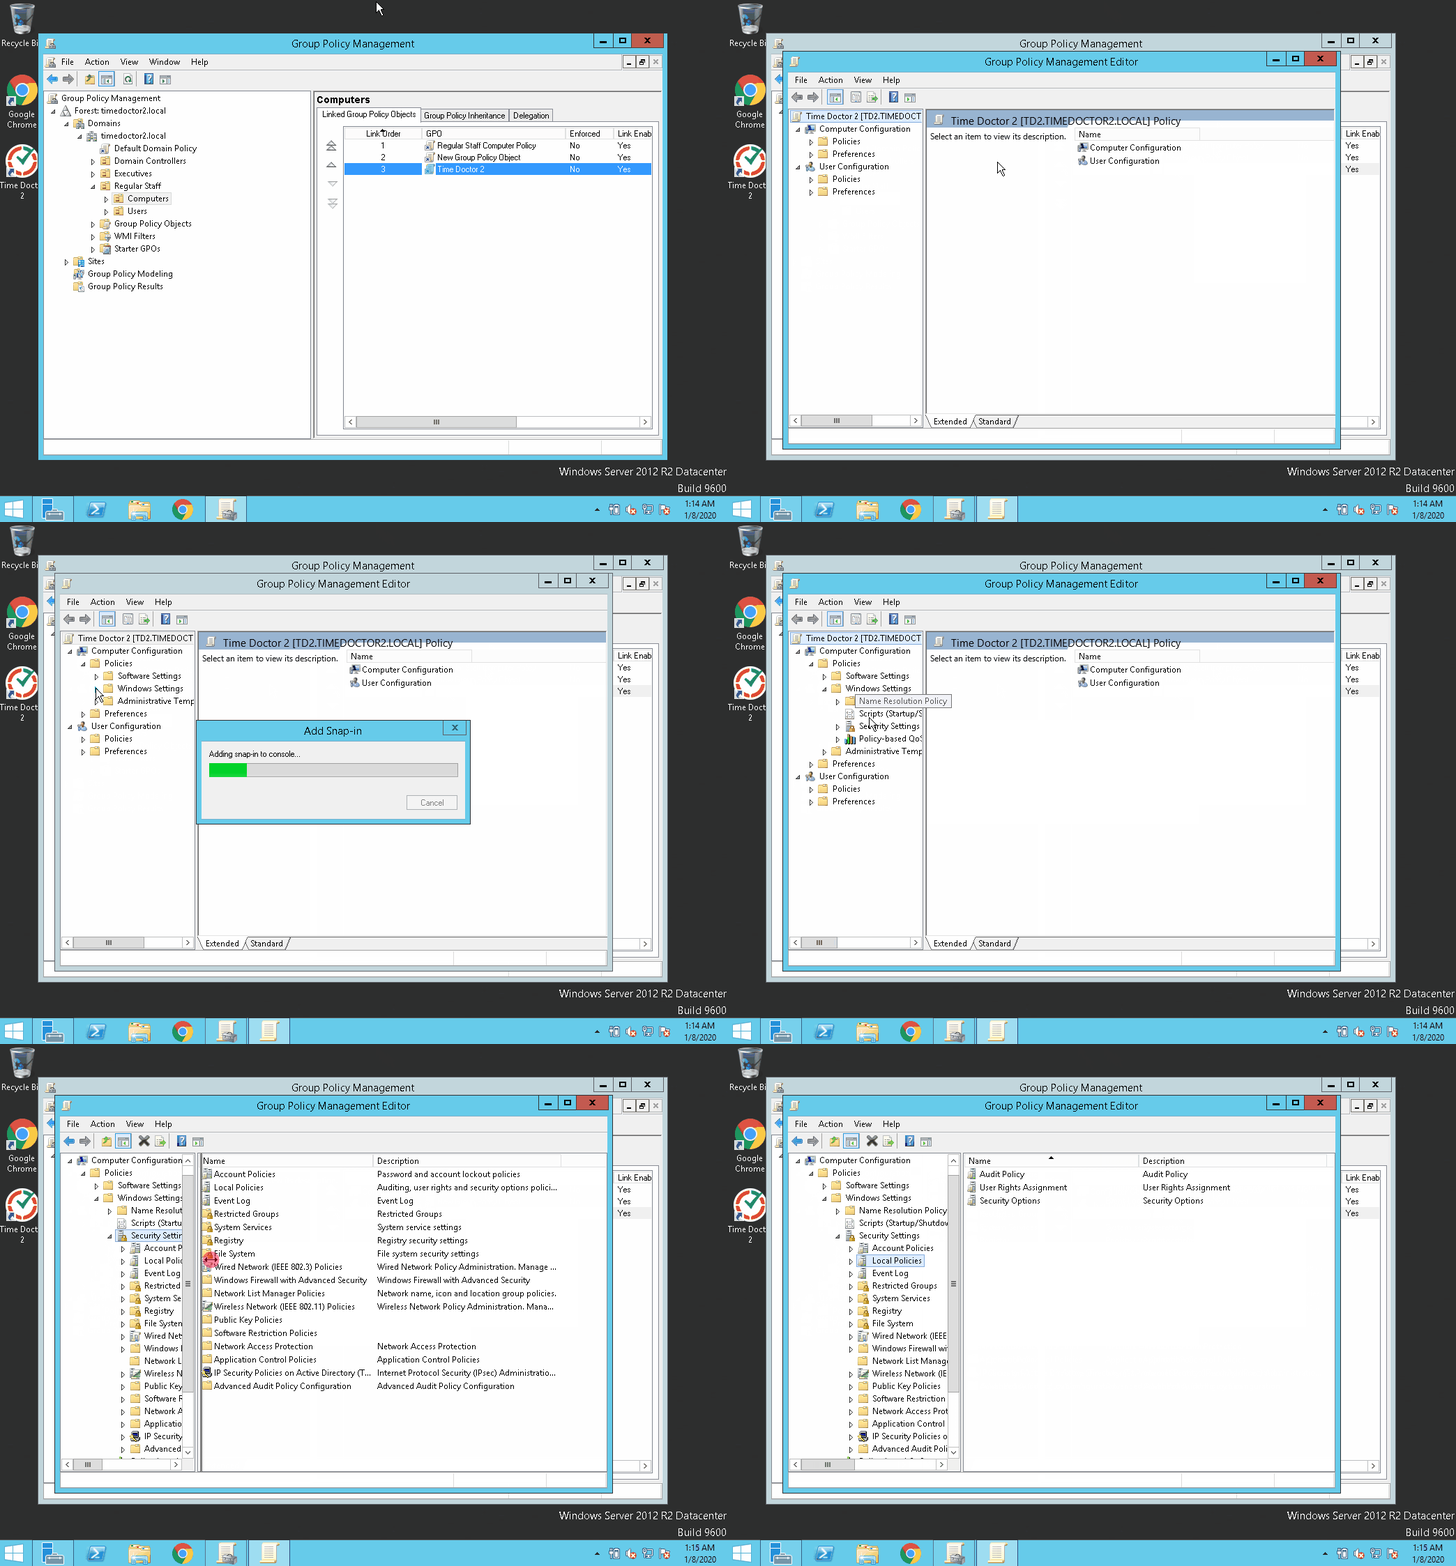
Step 3: Create a Group Policy Object (GPO)
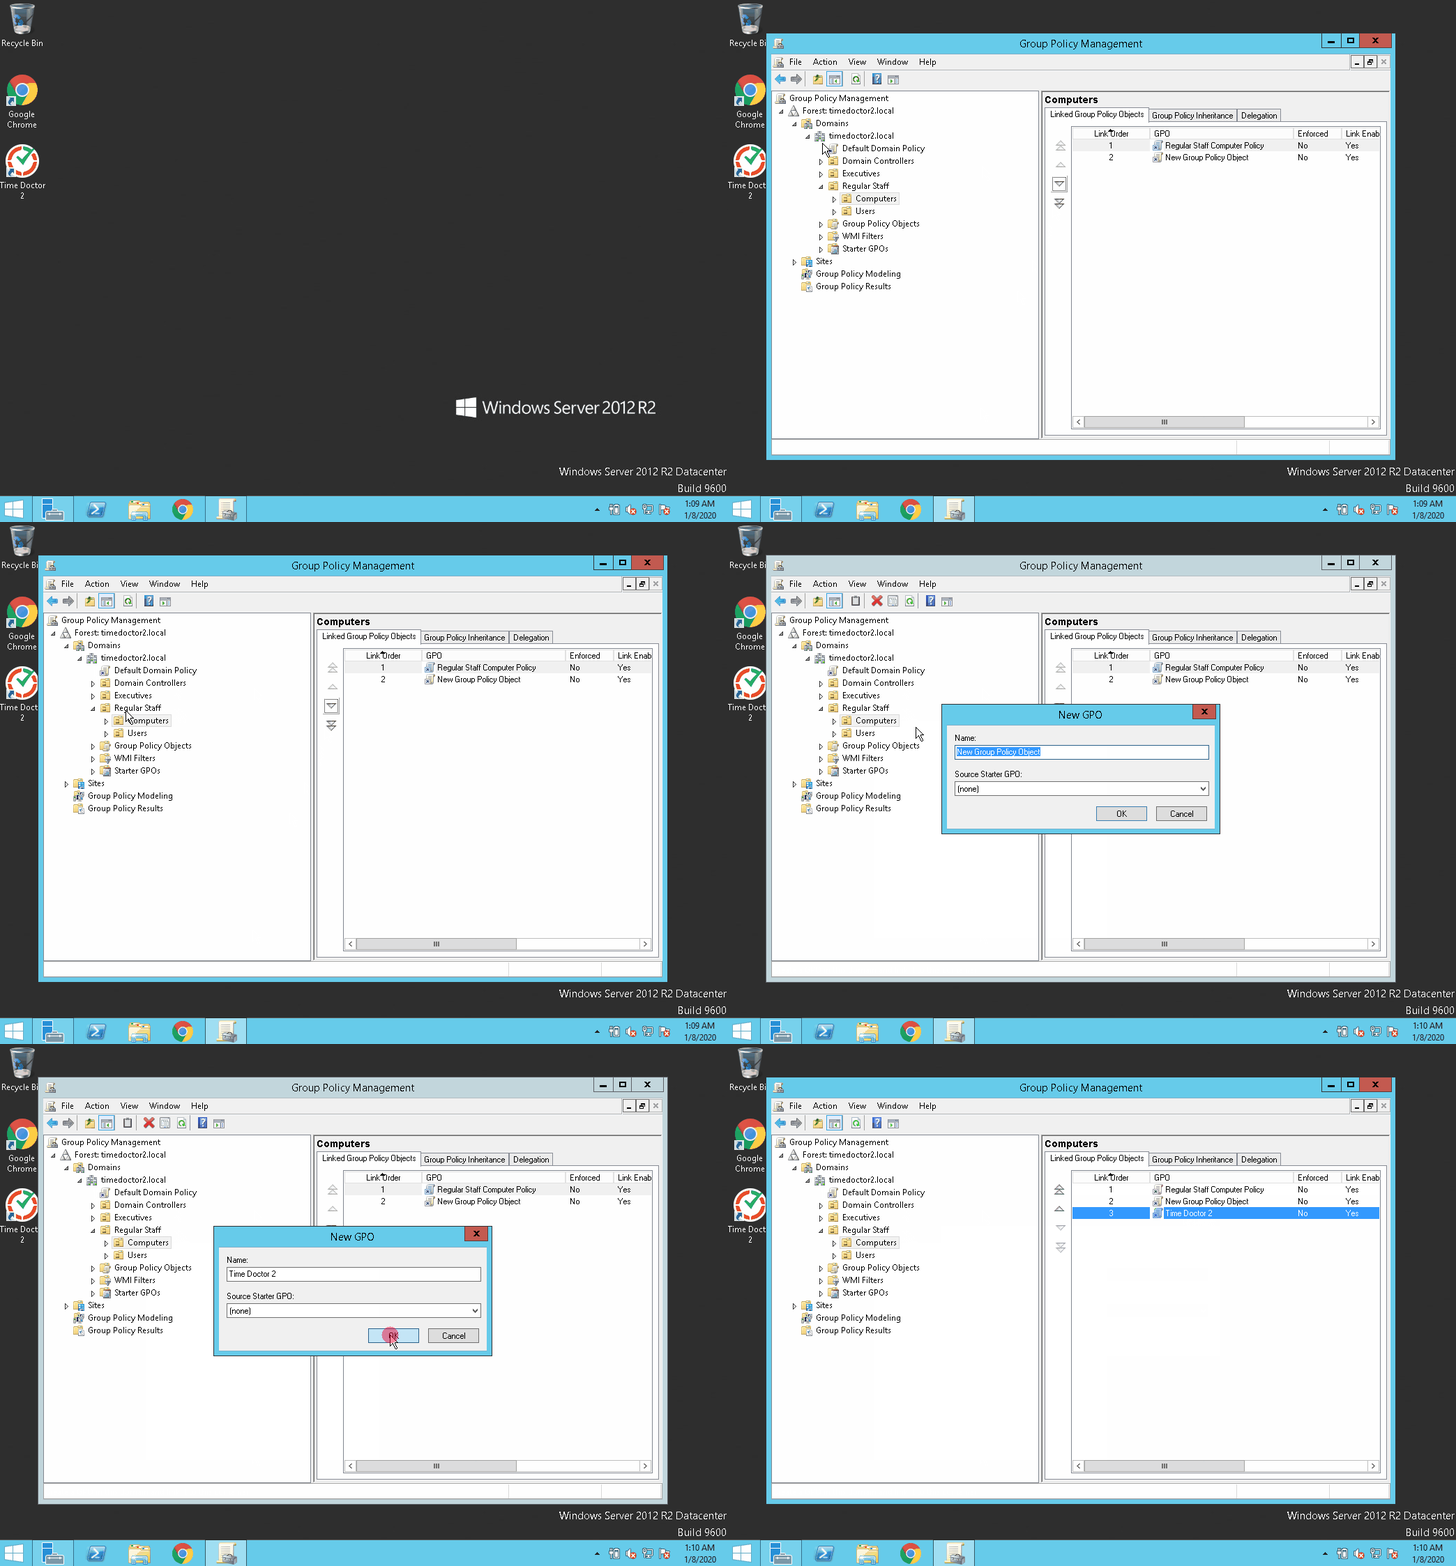
Open Group Policy Management and navigate to the target organizational unit (OU), such as Regular Staff / Computers.
Right-click the OU, select Create a GPO in this domain, and link it here, and name it (for example, Time Doctor).
Step 4: Configure Security Settings
Edit the GPO to bypass User Account Control (UAC) prompts:
- Right-click the Time Doctor GPO and select Edit.
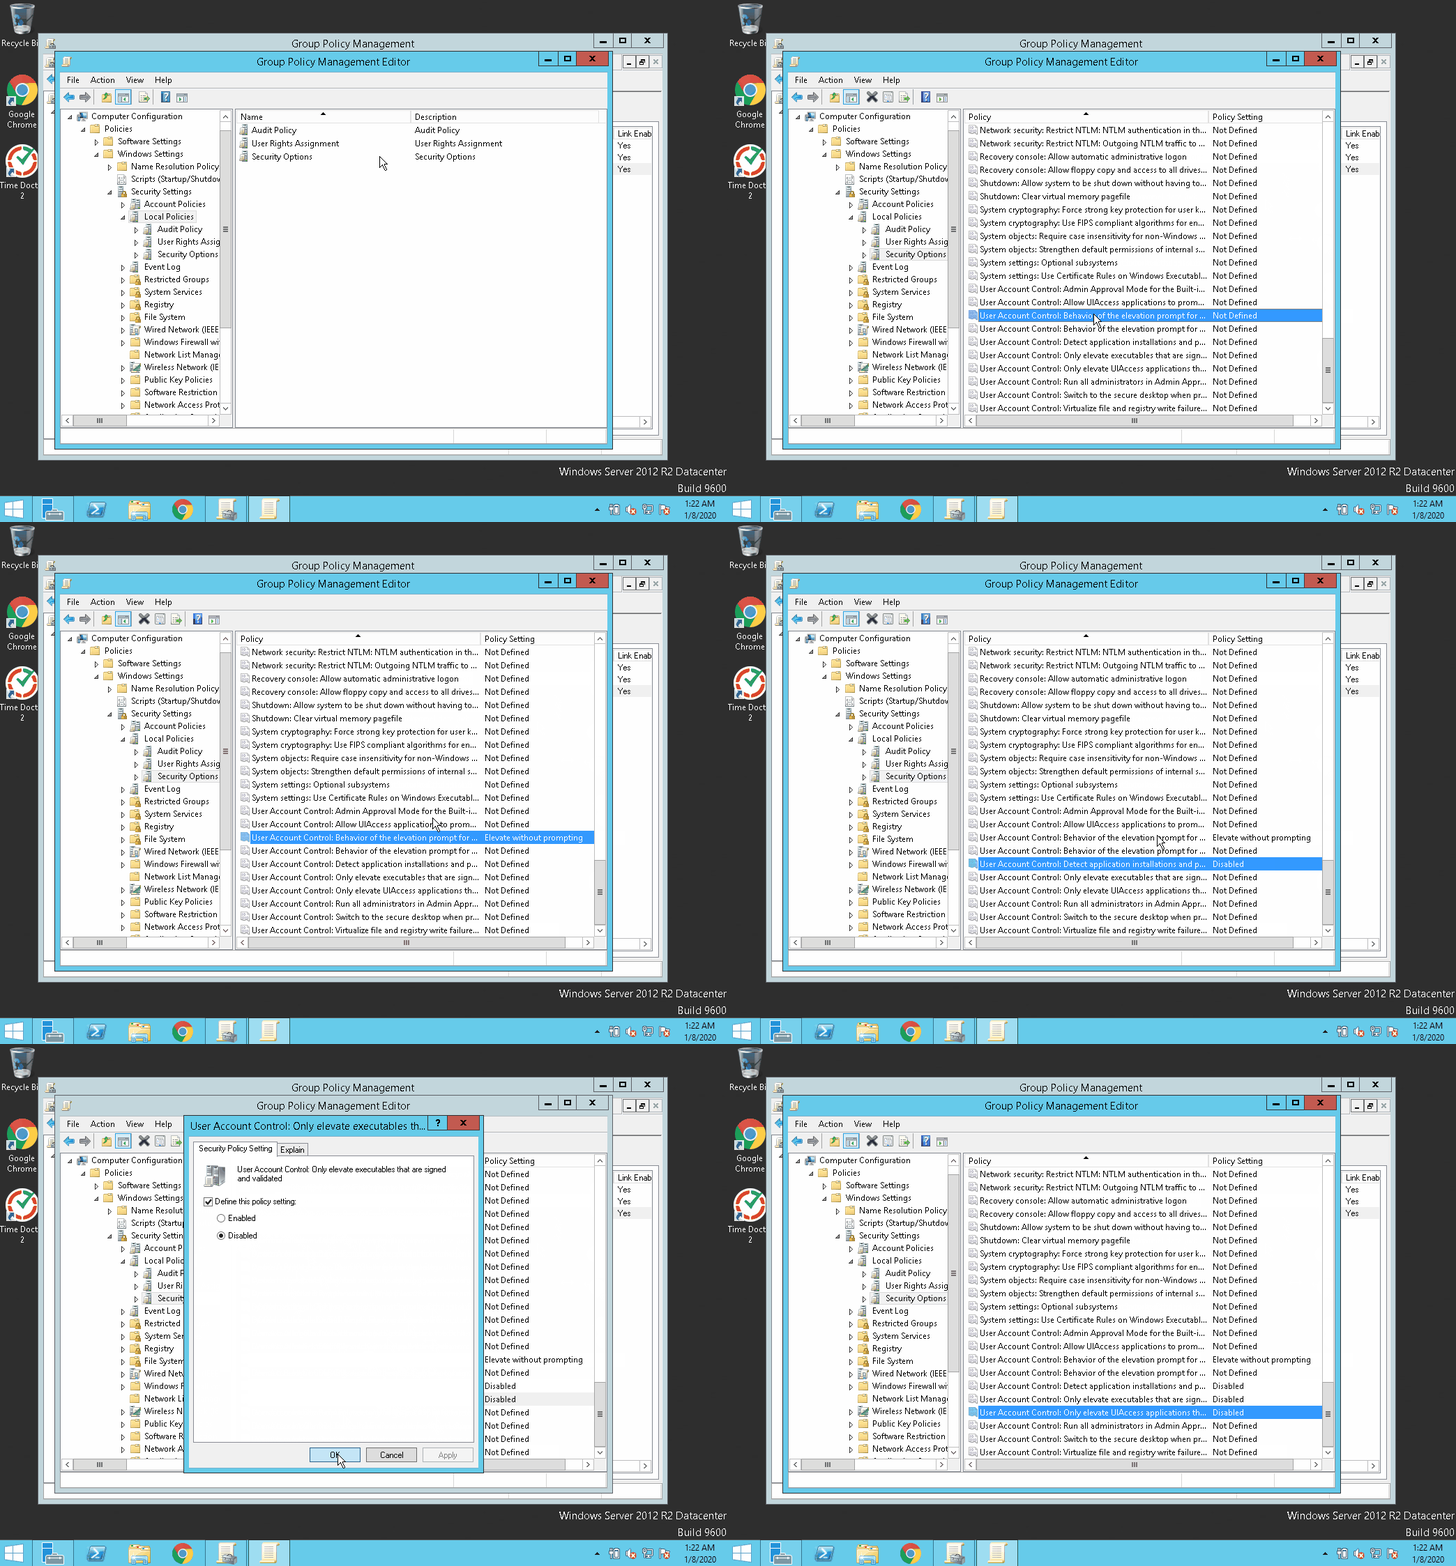
- Go to Policies / Windows Settings / Security Settings / Local Policies / Security Options.
Step 5: Adjust User Account Control Policies
Set the following policies:
- User Account Control: Behavior of the elevation prompt for administrators in Admin Approval Mode → Elevate without prompting
- User Account Control: Detect application installations and prompt for elevation → Disabled
- User Account Control: Only elevate executables that are signed and validated → Disabled
- User Account Control:Only elevate UIAccess applications that are installed in secure locations → Disabled
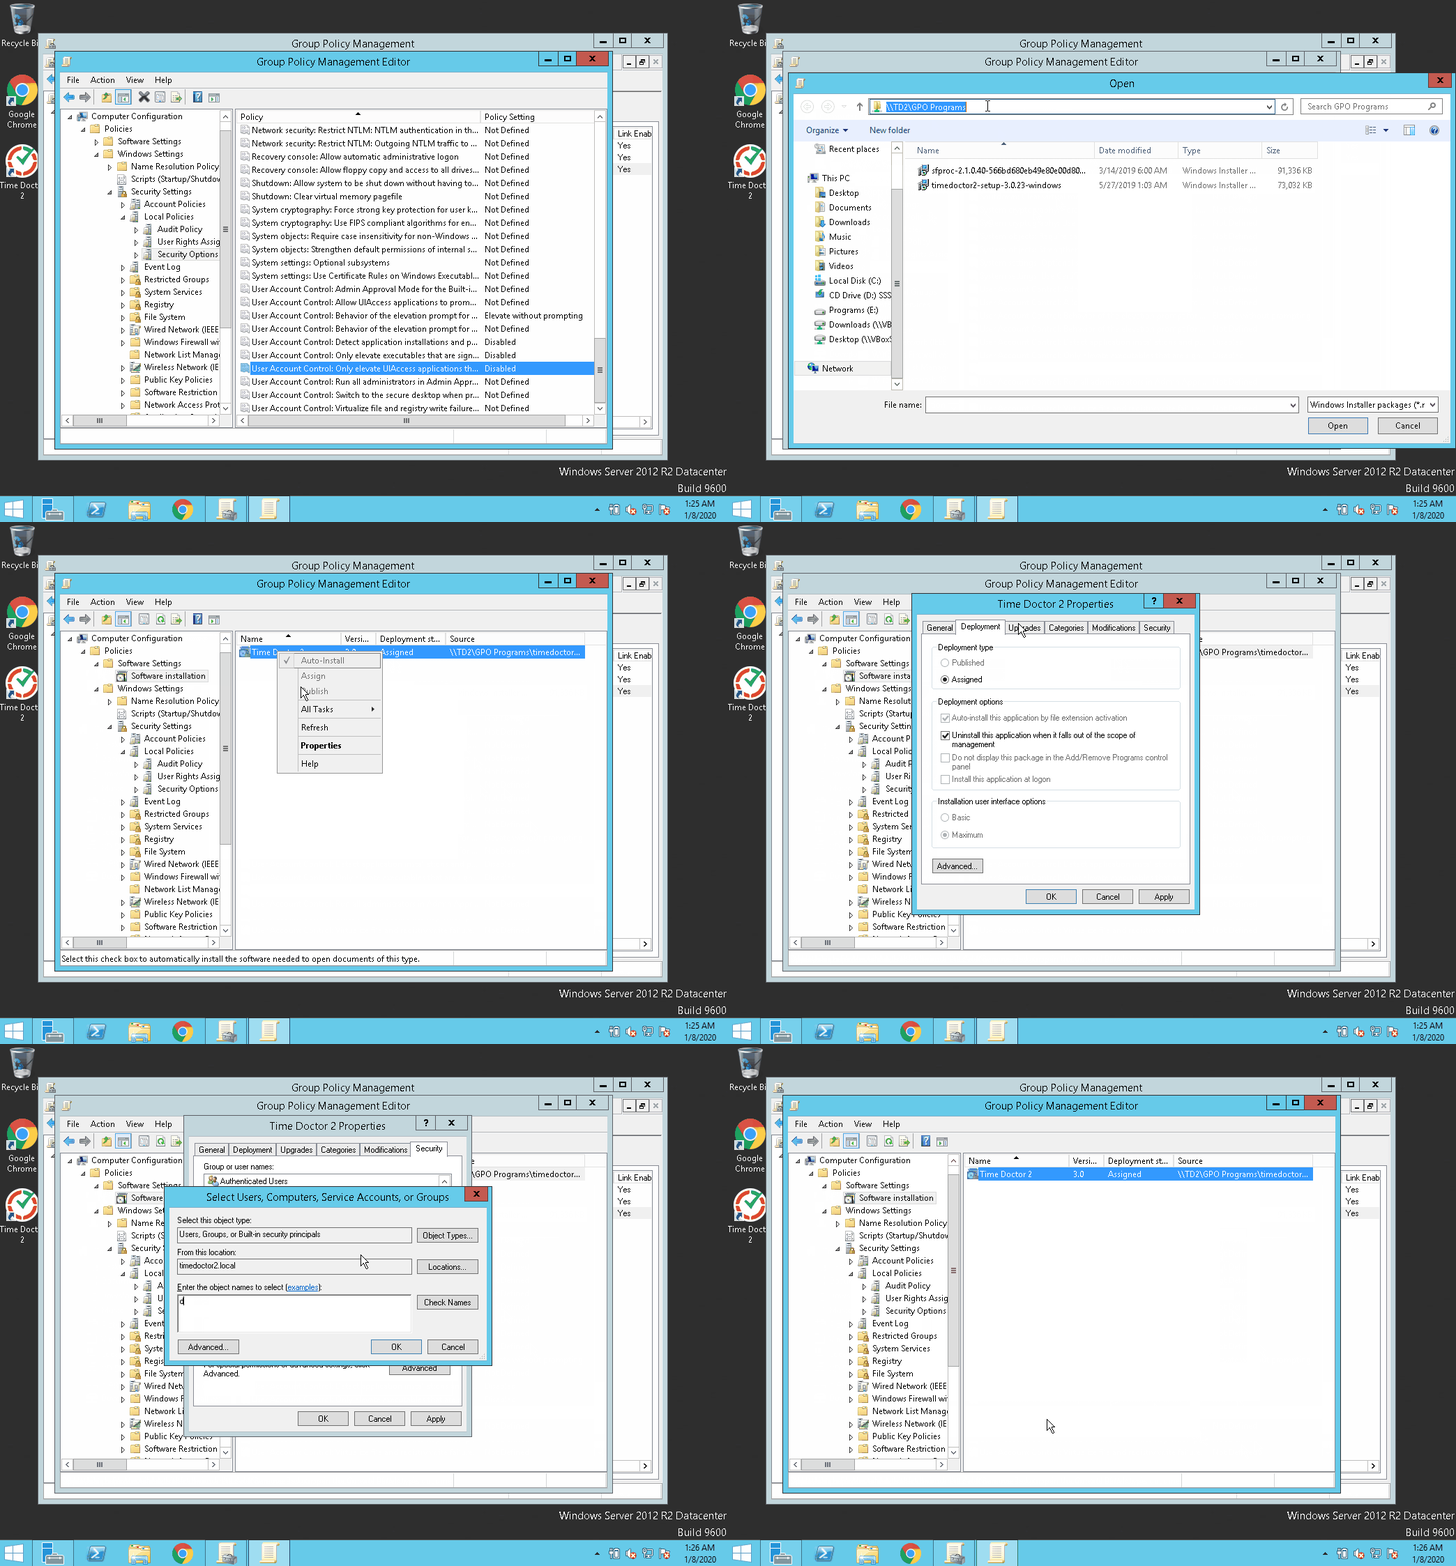
Step 6: Add the Time Doctor Package
Add the Time Doctor MSI package to the GPO software installation settings:
- In the Group Policy Management Editor, go to Software Settings → Software Installation.
- Right-click in the blank space and select New → Package....
- Select the network location of the Time Doctor MSI file (not a local machine).
- Select Open, choose Advanced, and in the Deployment tab, check Uninstall this application when it falls out of the scope of management. Select OK.
- Ensure domain users have Read access to the installer file.
Step 7: Apply and Test
Log in to confirm the Time Doctor desktop app installs automatically. Force a GPO update on affected OUs if needed.
Note: Automatic updates are not supported via GPO. Manually download new Time Doctor versions and add them to the Upgrades tab.
Uninstall
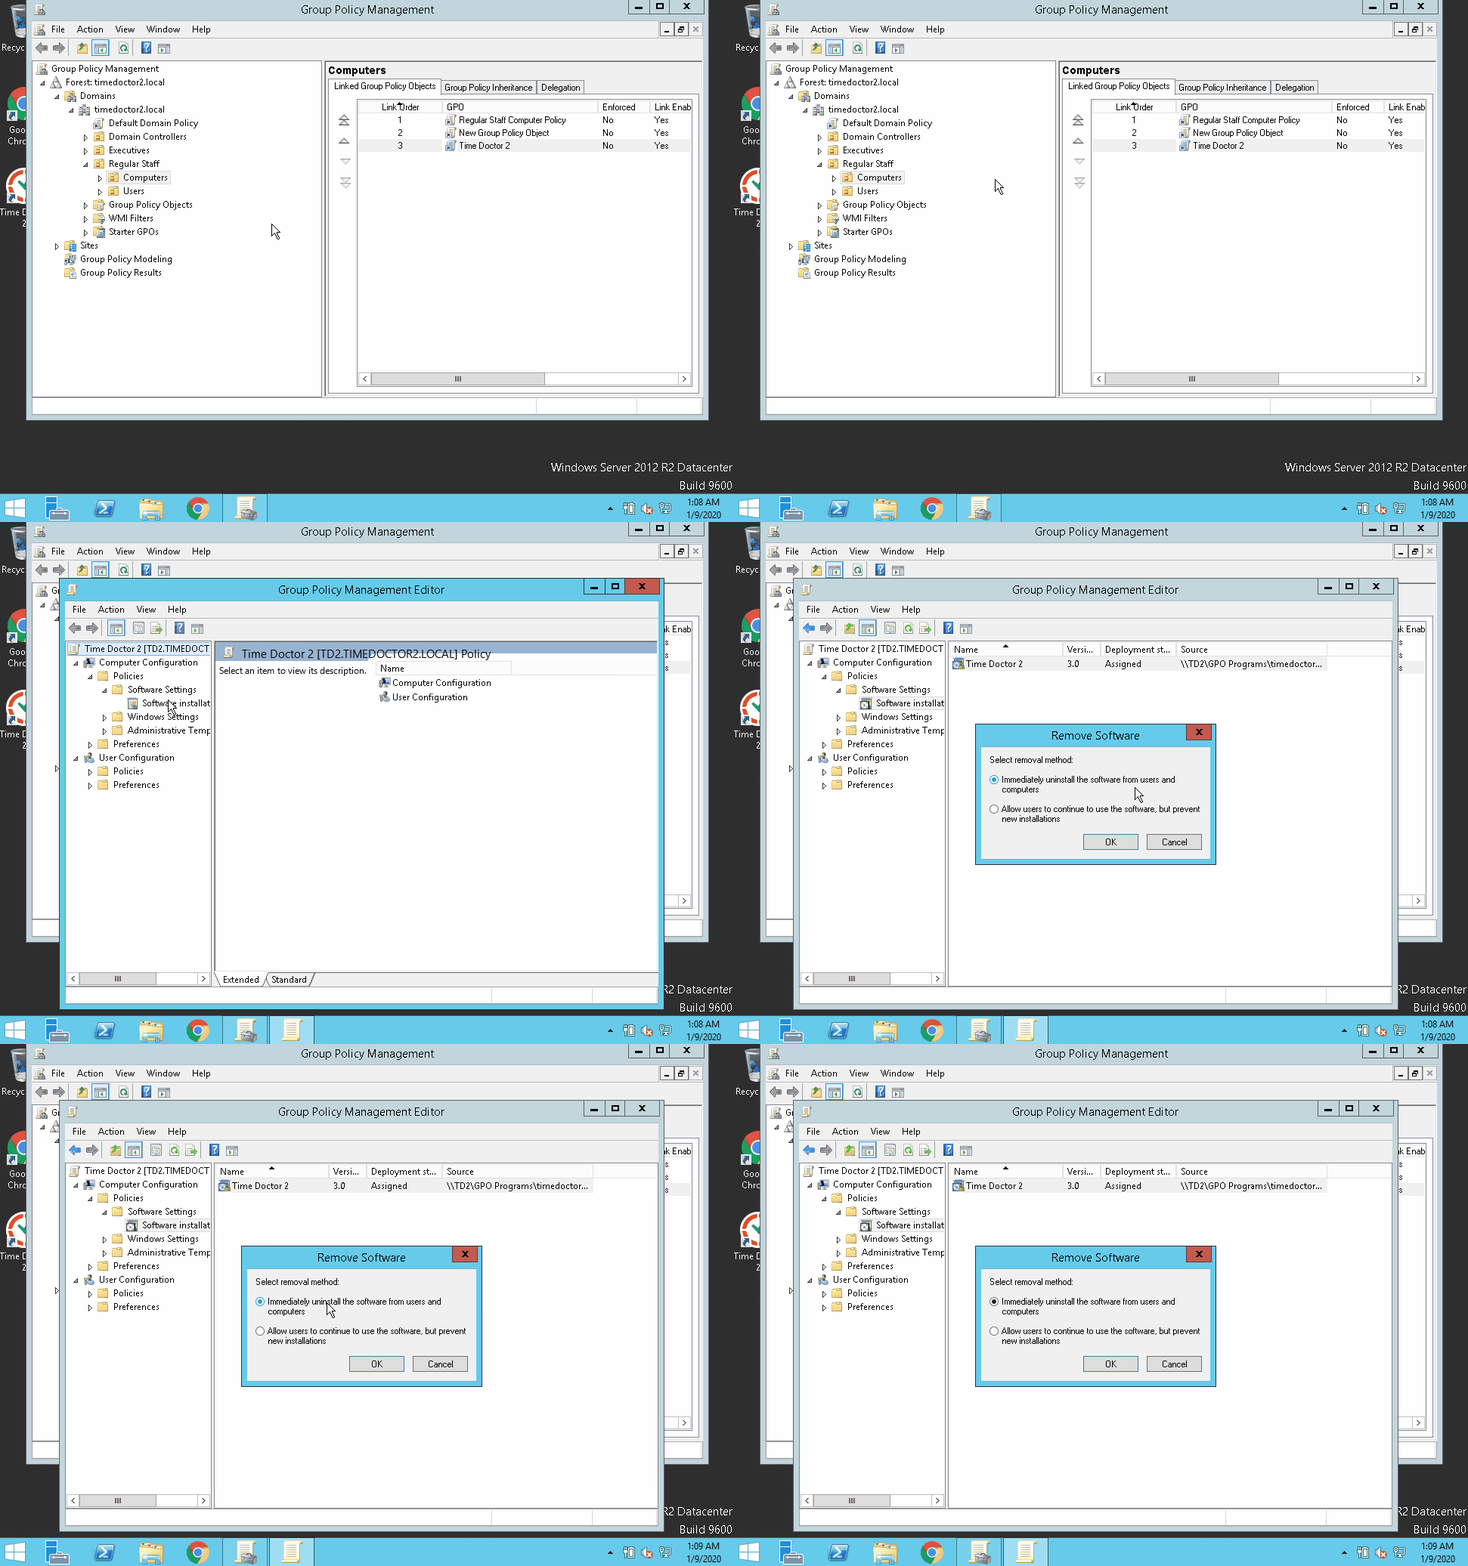
Remove Time Doctor by deleting the package from the created GPO.
Should there be any inconsistencies or concerns regarding the article, contact support@timedoctor.com for prompt assistance.

