
Note: The ClickUp Chrome Extension Integration is available on selected Time Doctor plans — see the pricing page for current plan availability. Once the integration is enabled at the account level, all access roles can use it. If the integration is restricted to specific users, access is controlled per user under Settings > Users > Integrations Task Column.
TL;DR:
To track time in ClickUp with Time Doctor, install the Time Doctor Chrome extension and enable the Time Tracking ClickApp in ClickUp. The extension inserts a Start/Stop button into every ClickUp task, and all tracked time syncs automatically with the Time Doctor desktop app and reports.
Enable the Time Tracking ClickApp in ClickUp and install the Time Doctor Chrome extension to track time directly from ClickUp tasks. Time tracked syncs with the desktop app and reports.
The Time Doctor Chrome extension inserts a Start/Stop button into ClickUp tasks. This allows time tracking directly from ClickUp without leaving the platform.
All tasks and time tracked using the extension are synced with the Time Doctor desktop app and appear in Time Doctor reports.
Step 1: Install the Chrome Extension
-
Install the Time Doctor Chrome extension from the Chrome Web Store.
-
Refer to the Chrome Extension Help Article for setup details.
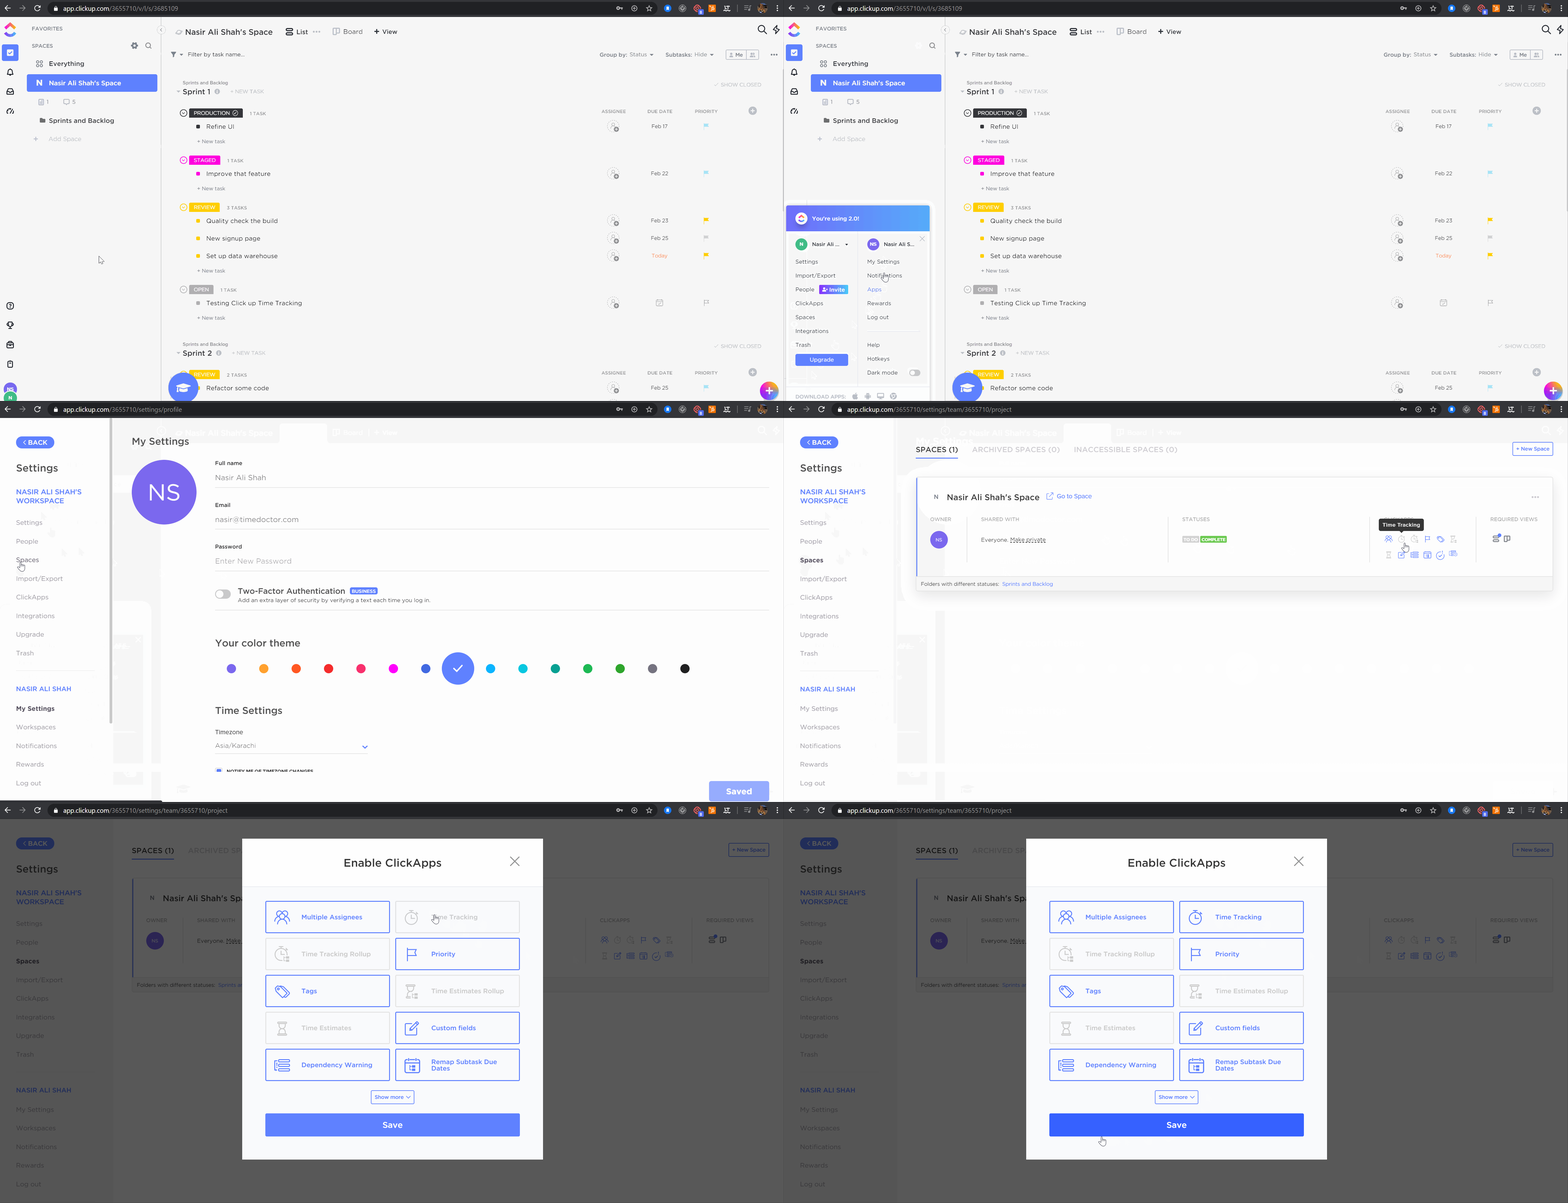
Step 2: Enable Time Tracking in ClickUp
Before using the integration, activate time tracking in ClickUp.
-
Go to My Settings / Spaces.
-
Under ClickApps, enable Time Tracking.
-
Select Save.
Step 3: Track Time in ClickUp
-
Open a ClickUp task.
-
Select the Start button inserted by the Time Doctor Chrome extension to begin tracking.
-
Stop tracking when the task is complete.
The recorded time automatically syncs with the Time Doctor desktop app and reports.
Should there be any inconsistencies or concerns regarding the article, contact support@timedoctor.com for prompt assistance.