
Note: Custom Mappings is available on the Premium plan and can be configured by Owners and Admins.
TL;DR:
Custom Mappings let Owners and Admins define how third-party data — currently limited to monday.com — appears in Time Doctor. Configure this under Settings → Integrations. Changes apply company-wide to all Chrome Extension users.
Custom mappings let Owners and Admins control how tasks from third-party apps appear in Time Doctor, ensuring consistent alignment between external tools and Time Doctor’s projects and tasks.
Currently, Custom Mappings is only supported for the monday.com integration.
What Custom Mappings Do
-
Control how task names appear in Time Doctor by selecting one or more fields from monday.com.
-
For example, configure Time Doctor to display both the Group and Task names from monday.com.
-
The configuration applies company-wide to all users who track time with the Chrome Extension.
Configure Custom Mappings
-
Go to Settings → Integrations.
-
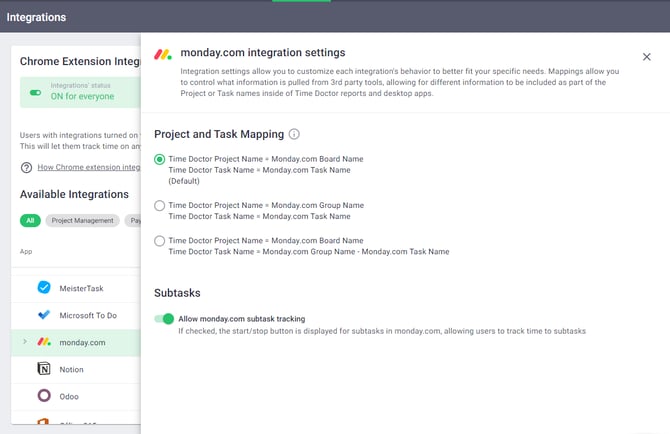
Select the integration (e.g., monday.com).
-
In the side panel, locate the Custom mapping section.
-
Choose the monday.com fields you want to map into Time Doctor (e.g., Group, Task, or Item Name).
-
Save your changes. The configuration takes effect immediately and applies to all users in the company who track time via the Chrome Extension.
Important Notes
-
Only Owners and Admins can set up or edit custom mappings.
-
Custom mappings are currently limited to the monday.com integration.
-
All changes are automatically applied across the company.
If you have questions or notice anything that needs updating in this article, reach out to support@timedoctor.com — we're happy to help.