
Note: The Projects & Tasks feature is available in all of Time Doctor Subscription plans and can be configured by Admin or Owner access roles by default, and Manager role if permission to create projects is granted.
TL;DR:
Learn how to create and manage projects and tasks in Time Doctor, assign users, and configure access permissions. Ensure projects contain at least one task to appear in desktop apps.
How to create a project
-
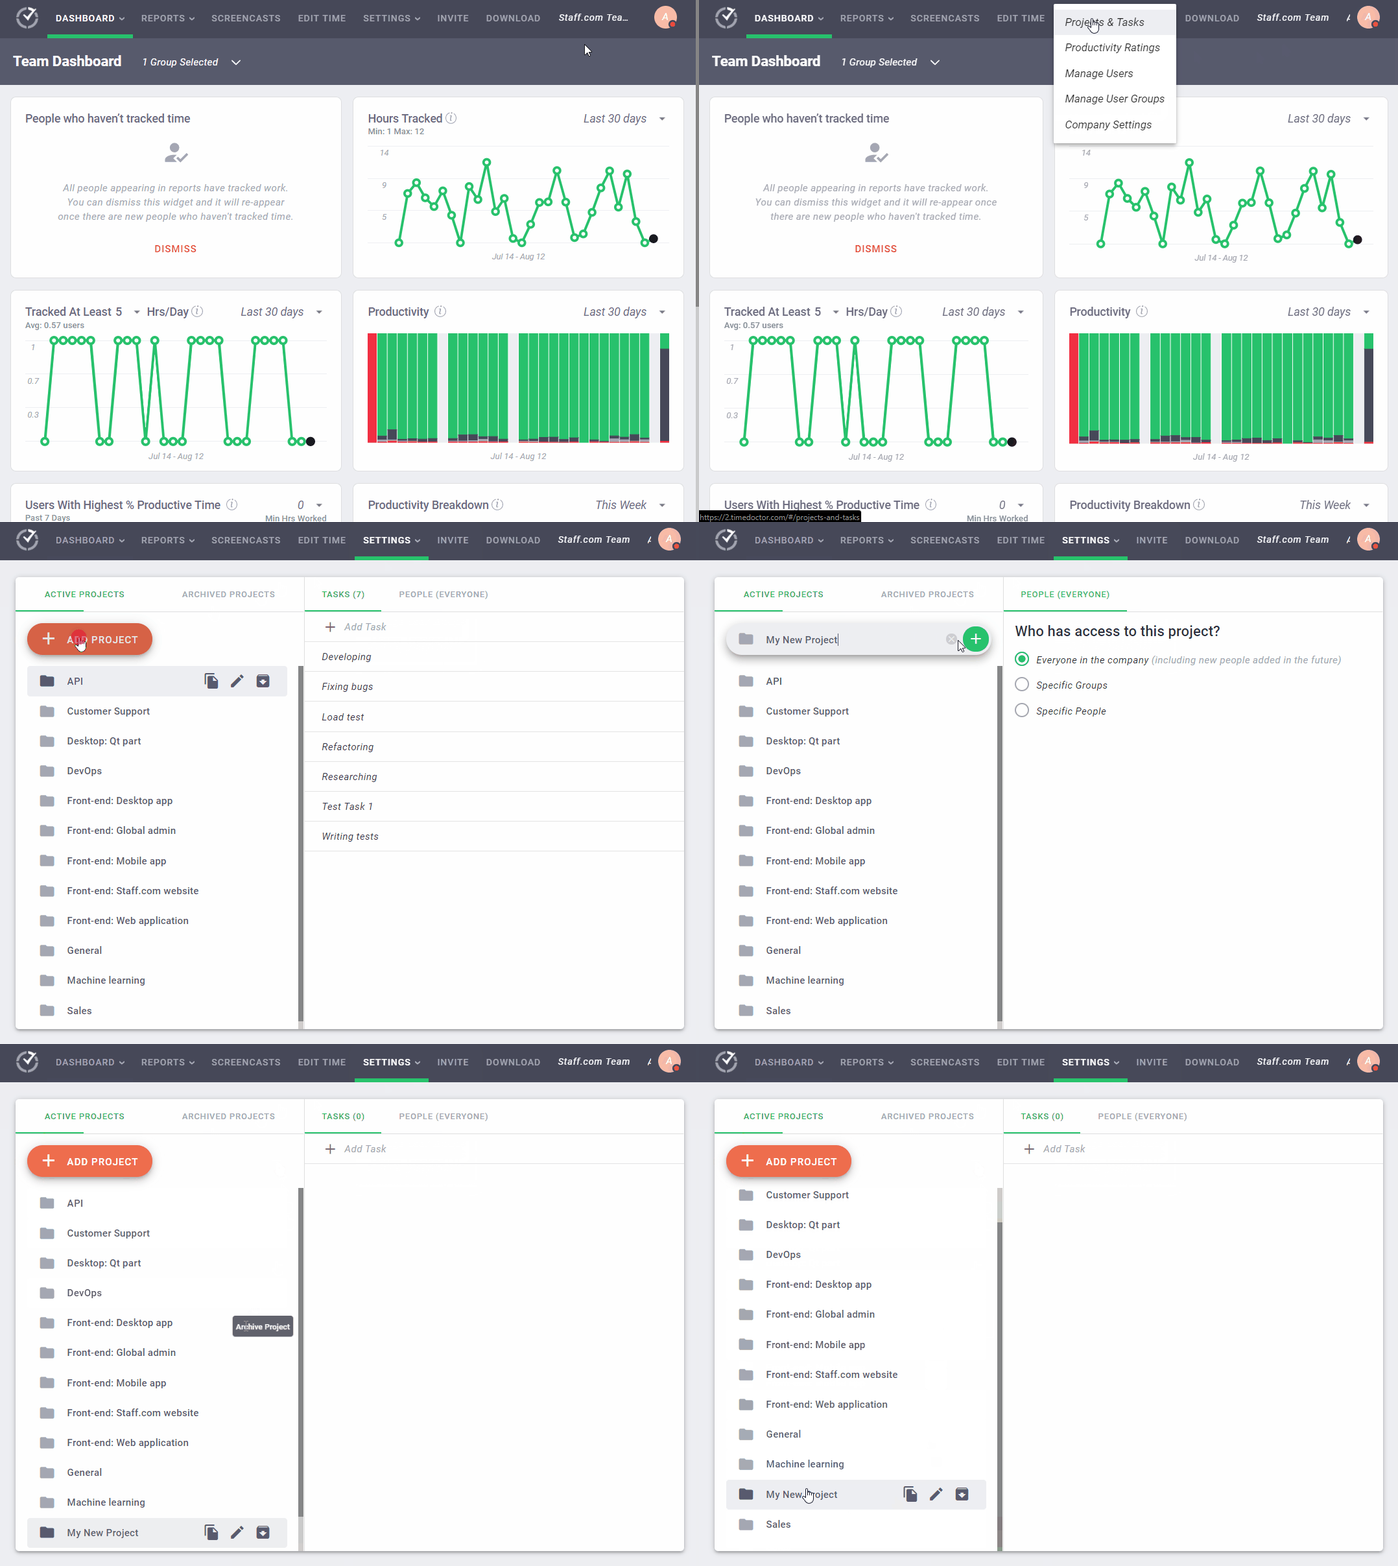
Go to Settings / Projects & Tasks.
-
If this page is not visible, enable the feature under Settings / Company Settings by toggling on Use projects & tasks.
-
-
Click Add Project.
-
Enter the project name and click the button to add it to the list.
How to add tasks and users to a project
-
Navigate to the Tasks tab of the selected project.
-
Click Add task and enter a task name.
-
Go to the People tab of the selected project.
-
Choose the users who should have access to the project and its tasks. Options include assigning the project to:
-
All employees
-
Selected employees
-
Specific user groups
-
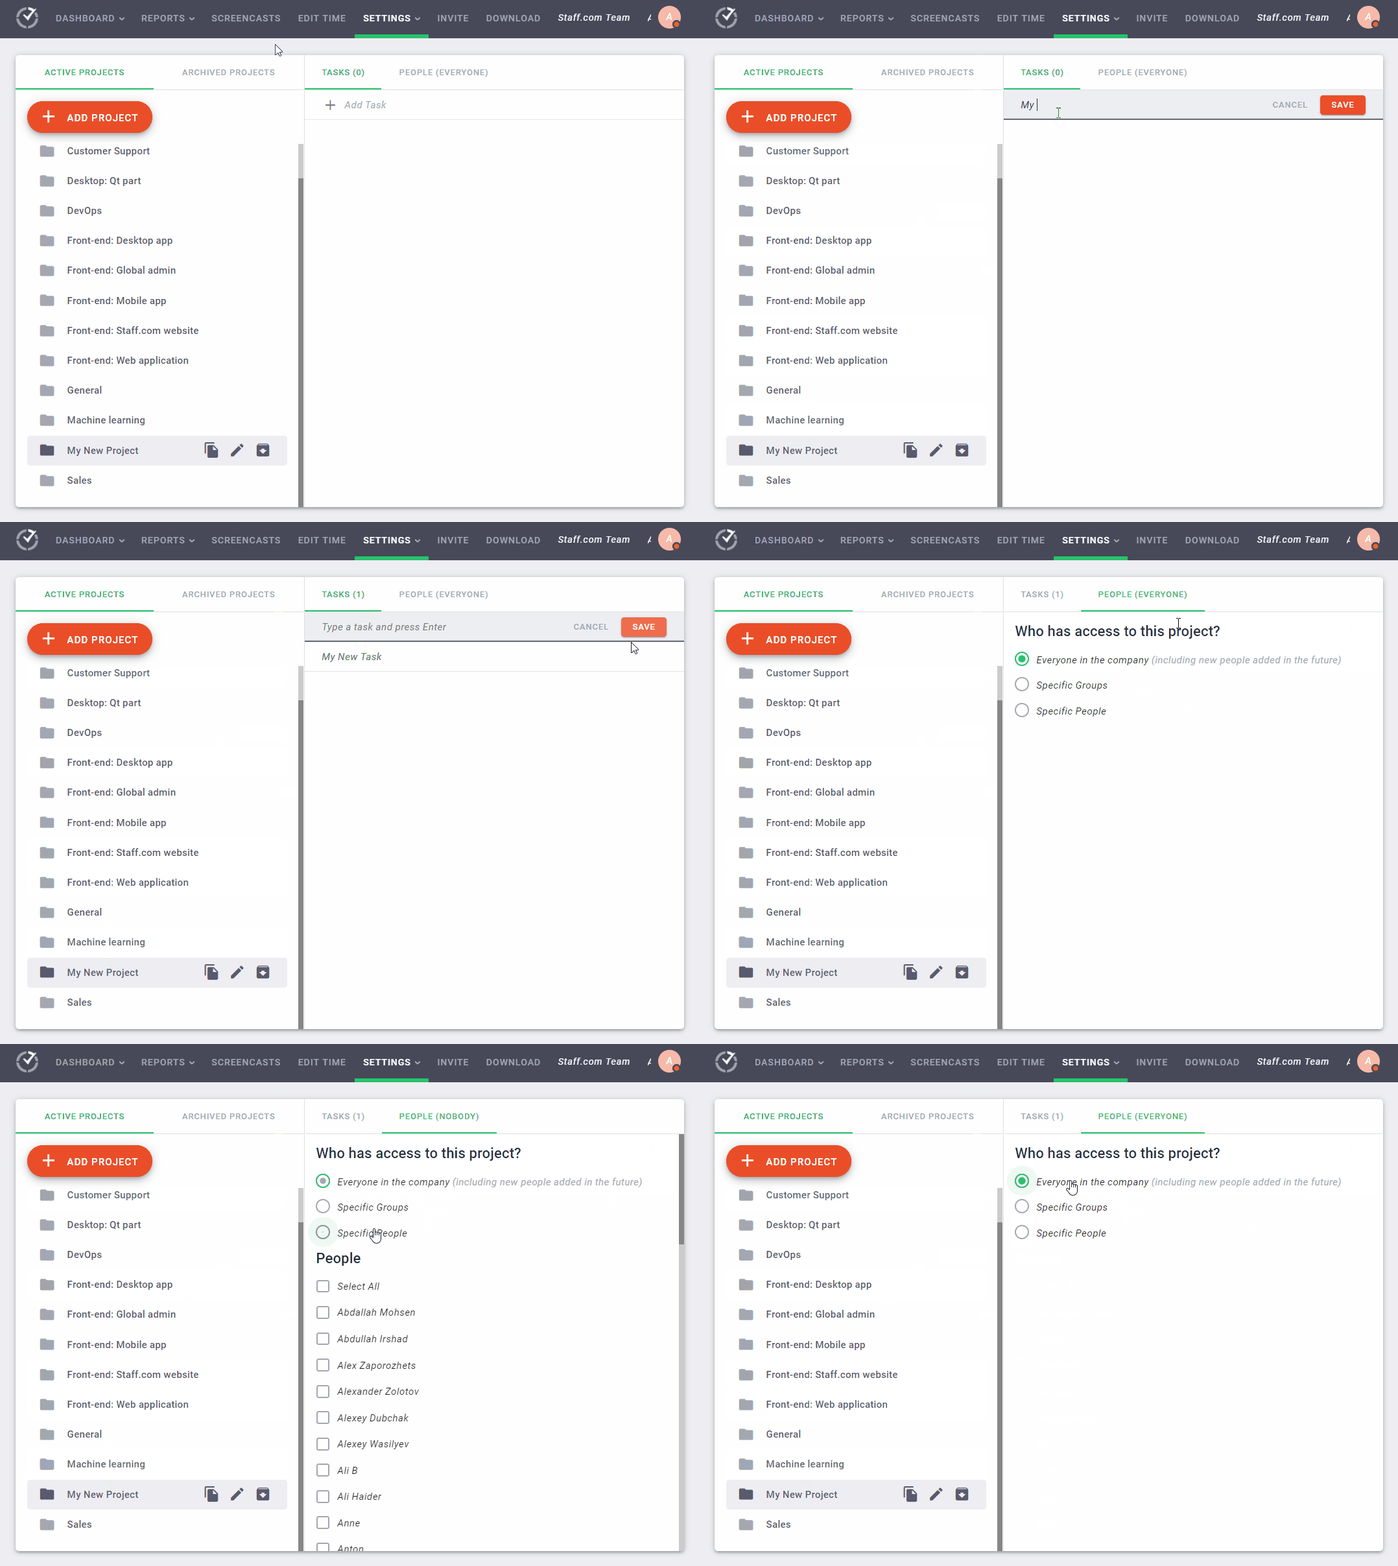
Note: A project must contain at least one task for it to appear in the desktop app.
How to remove a project
- In Settings / Projects & Tasks, locate the project in the list.
- Click the Archive button next to the project name to remove it from active view.
Archived projects are hidden from the active project list and from the desktop app, but their historical time-tracking data is preserved. To permanently delete a project, contact support@timedoctor.com.
Who Can Create Projects and Tasks?
By default, only Owners and Admins can create projects and tasks.
To allow Managers to create them:
-
Go to Settings / Company Settings.
-
Enable the Allow managers to create projects and tasks setting.

To allow Regular Users to create their own tasks, see How to Create Tasks from the Desktop Application.
Should there be any inconsistencies or concerns regarding the article, contact support@timedoctor.com for prompt assistance.