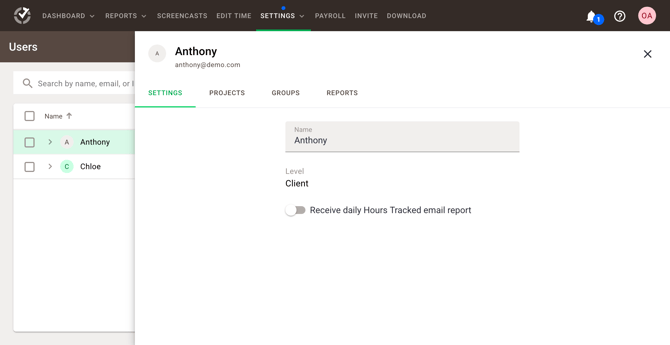
Note: Client Access is available in the Time Doctor Premium plan and can be accessed by Account Owners and Admins.
Client Access in Time Doctor is a free, read-only permission level that allows external stakeholders to view selected reports, groups, and projects without the ability to edit data or track time. It is available on the Time Doctor Premium plan and can be set up by Account Owners or Admins.
What Client Access Means
-
Provide free, read‑only access for external stakeholders (e.g., clients).
-
Allow visibility only to chosen reports, users (via Groups), and projects.
-
Prevent actions such as tracking time or editing other users’ data.
Before Starting
-
Confirm the Premium plan is active.
-
Ensure the person setting this up has Account Owner or Admin access.
Invite a Client
-
Open Invite.
-
Enter the client’s email address.
-
Set Access level to Client.
-
Under Groups, select the employee group(s) the client may view. (Optional)
-
Under Projects, select the project(s) the client may view. (Optional)
-
Under Reports, choose which reports the client may access.
-
Send the invitation.
Note: The invitation email may take a few minutes to arrive. If the client does not receive it, ask them to check their spam or junk folder, or resend the invitation from Settings → Users.
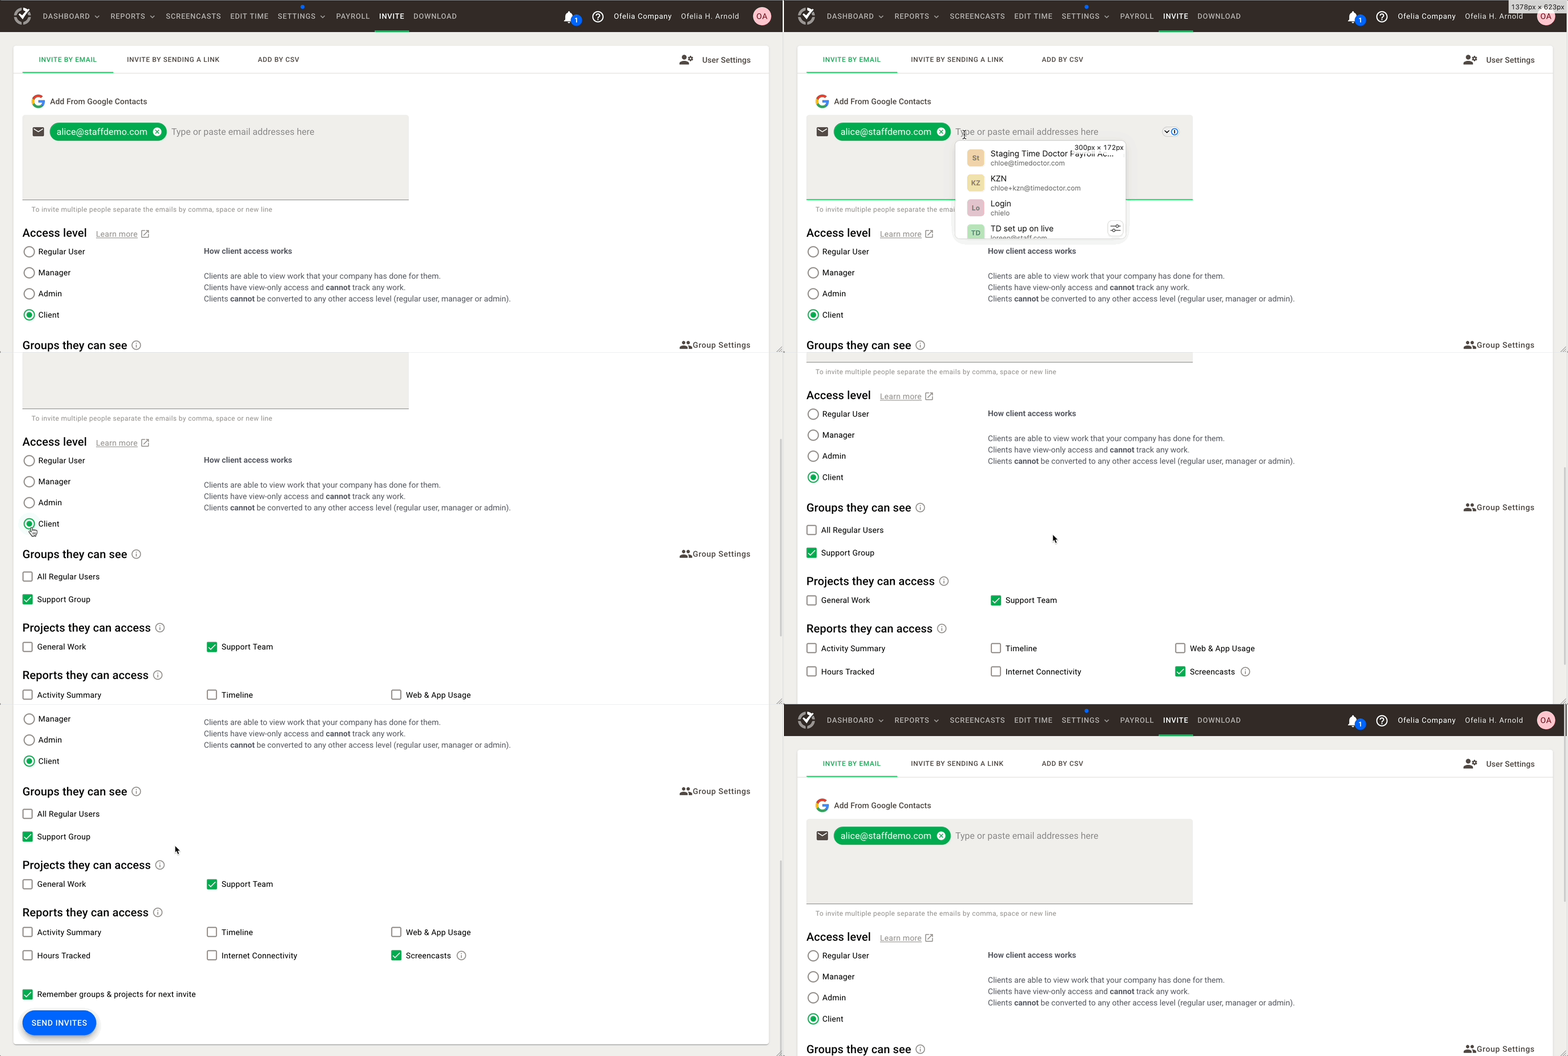
What the client receives: An email with a Join Your Team link to complete registration (name + password). After login, the client sees only the reports granted.
Tip: Selecting either Groups or Projects can be sufficient. Use both only when a combined restriction is needed.
Change a Client’s Visibility Later
-
Go to Settings → Users.
-
Locate the client account and select Edit (pencil icon).
-
Adjust access in the Projects, Groups, and Reports tabs.
Note: Changes to a client's access take effect immediately. The client will see the updated permissions on their next page load or after logging back in.
Projects, Groups, and Reports tabs.
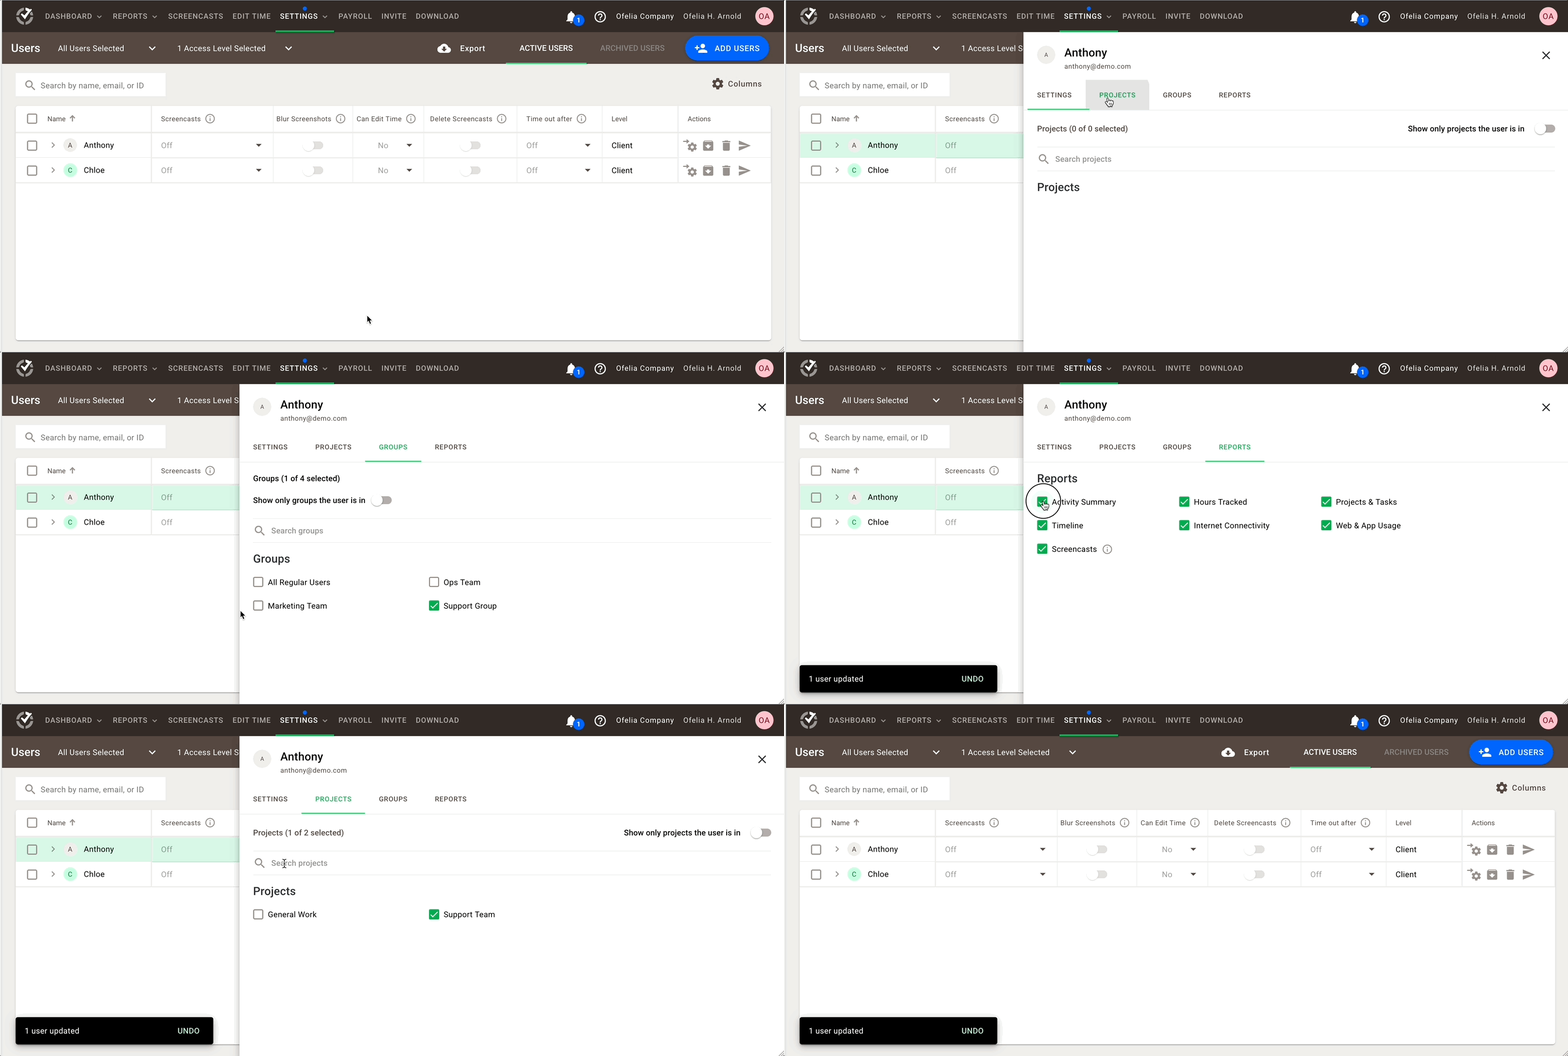
How Client Visibility Rules Work in Time Doctor (Groups vs. Projects)
-
Result: All work performed by users in the selected group(s), not limited by project.
-
Result: All work on the selected project(s) by any users, not limited by group.
-
Result: Only work on the selected project(s) by the selected group(s). Works the same with multiple groups and multiple projects.
-
Configure on Settings → Users for the client account to receive the Daily Hours Tracked email report.