
Note: Payroll is available on the Standard and Premium subscription plans, and it is only available to Interactive companies (not Automatic companies). Payroll access is limited to Owners by default. Owners can grant access to other users.
TL;DR:
Enable payroll in Time Doctor, configure pay rates and methods, apply limits, and export as CSV or ZIP for integration with PayPal, Wise, Payoneer, Gusto, ADP, or Deel.
Payroll can be generated for any user and exported as a CSV file for use with PayPal, Wise, Payoneer, Gusto, ADP, Deel, or spreadsheets.
Who Can Access Payroll?
Only the company owner can enable payroll and grant access to other users of any access level. Configure this on the Settings / Company Settings page under Who can access payroll.

Enable Payroll
- Go to Settings / Company Settings page under the Configuration section.
- Scroll to Use payroll and toggle it ON.
- Access the new Payroll menu item at the top and open the Payroll page to configure and generate payroll.

Configuring Payroll
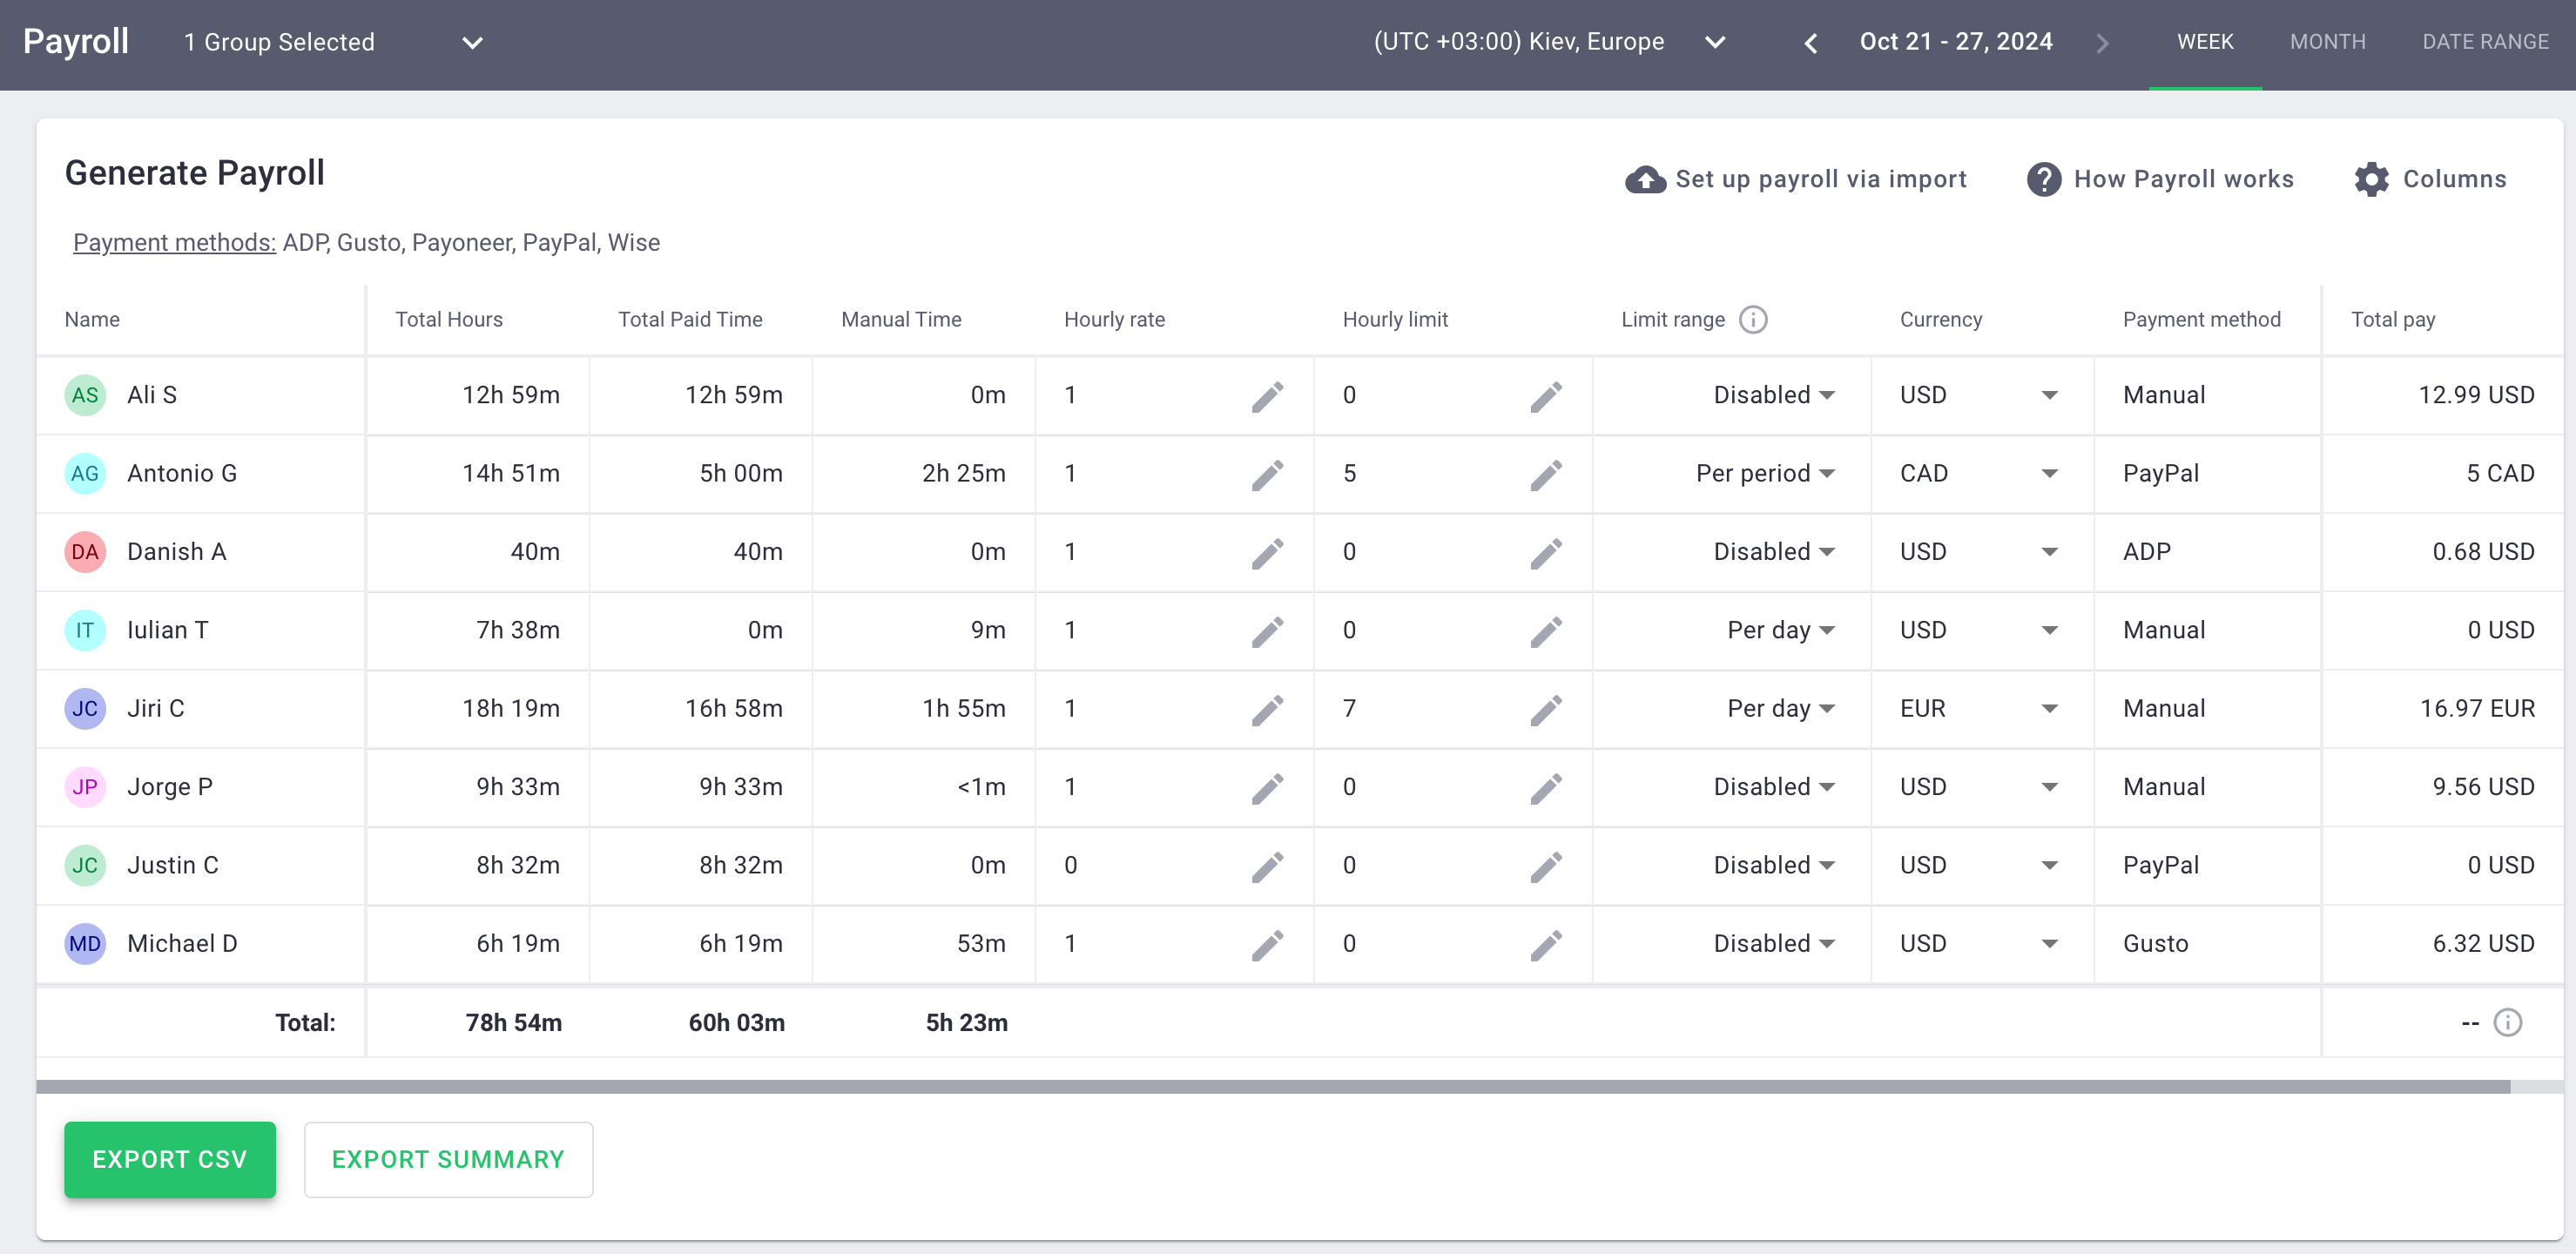
On the Payroll page:
- Enable additional payment methods: PayPal, Wise, Gusto, Payoneer, ADP, and Deel. (Manual payment method is available by default.)
- Select users or groups to include in payroll.
- Select a payroll date range.
- Add hourly limits for each user:
- Per Period: Limit for the entire payroll period.
- Per Weekday: Limit based on weekdays only (e.g., 8 hours × number of weekdays).
- Per Day: Limit per individual day, including weekends.
- Per Workday: Limit per weekday (Mon–Fri) only. (Hourly limit and limit range are not supported for the Deel payment method.)
- Select payment currency.
- Enter pay rates for each user.
- Optionally, add or deduct adjustments (e.g., bonuses).
- Select the payment method for each user.
Export payroll
- Single payment method: Export as a CSV file for PayPal, Wise, Gusto, Payoneer, or ADP.
- Multiple payment methods: Export as a ZIP file containing separate CSVs.
- Summary export: Use Export Summary to generate one CSV file for all selected users regardless of payment method.
Time Doctor recalls currencies, pay rates, and methods for the next payroll cycle.
Set up Payroll via CSV Import

- Download the CSV template.
- Fill in payroll details using Excel, Numbers, Google Sheets, or similar software.
- Upload the completed CSV file.
Payment Method Information

-
Learn more about Wise batch payments.
-
Learn more about PayPal Mass Payment.
-
Learn more about uploading CSV files to Payoneer and configuring Payoneer.
-
Learn more about ADP integration for Payroll.
-
Learn more about configuring Gusto integration.
-
Learn more about configuring Deel integration.
Should there be any inconsistencies or concerns regarding the article, contact support@timedoctor.com for prompt assistance.